Thursday, July 30, 2009

Wonderful Fantasy


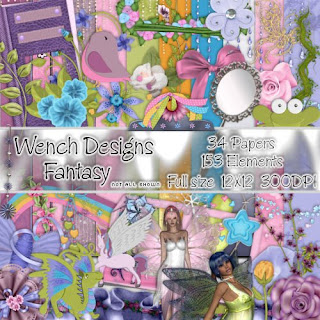
Wench Designs has a fantastic new kit called "Fantasy" & it is available in both full & tag size, that includes among its 153 elements 10 posers from KarinaKatKreations!
I was a very happy scrapper when Vella let me play with this one & I have a tag with tutorial, and 2 freebie quick pages for you.
Tutorial for “Fantasy” tag

What I used:
Gorgeous kit from Wench Designs called “Fantasy”, available in full http://thecreativitybox.com/index.php?main_page=product_info&cPath=1_125&products_id=3838&zenid=3b5cebfeb524c65fee8d426813a468c1
& tag size, http://thecreativitybox.com/index.php?main_page=product_info&cPath=1_125&products_id=3837 with 10 Posers from Karina Kat (www.KairinaKatKreations.blogspot.com) included.
Adobe Photoshop Creative Suite 4.0
(Make sure “show transform controls” is checked, for easy resizing.)

What I did:
1. Open a new transparent canvas 600 pixels x 600 pixels. Use circular selection tool to draw a large circle & fill with background of choice (paper 15).
2. Choose fantasy creature element (flying unicorn 1). Copy, paste, & resize as needed. Apply bevel & emboss effect.
3. Choose one of Karina’s posers, or any poser or tube of your choice (Elisa 14 pink fairy). Copy, paste, & resize as needed.
4. Choose a type colour & font (Bix Antique Script 14) & enter desired text onto tag. Apply style (Yarrow glitter 10), if desired. Use a smaller font for tag information (Arial 2).
5. Merge visible & save.
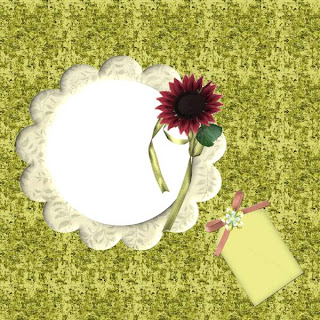
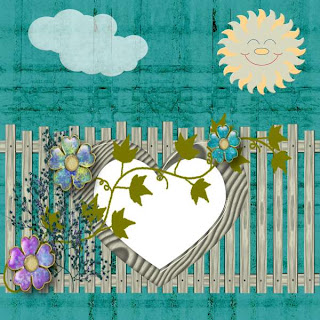
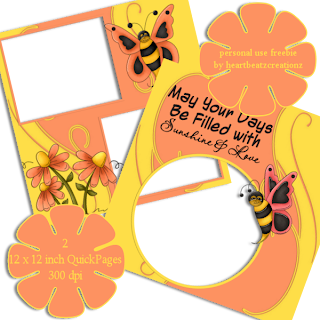
Please remember, these quick pages are for personal use only.
Enjoy.


Tuesday, July 28, 2009

Smile


Heartbeatz Creationz has a new 300dpi tag kit out called "Smile Because" & I have made you a quick page set using it & done a tag with tutorial, making my first tag template in the process.


Tutorial for “Smile Because” tag
What I used:
Tag kit by Heartbeatz Creationz called “Smile Because”
http://heartbeatzcreationz.com/index.php?main_page=product_info&cPath=1_84&products_id=2476
Paint Shop Pro XI
{Make sure you have activated the Pick tool on your toolbar for easy resizing.}
What I did:
1. Open a new transparent canvas 600 pixels x 600 pixels. Use preset shape to draw an oval in the upper left corner of canvas. Create new vector layer & draw another oval in the lower right corner. Create new vector layer & use preset shape to draw a heart somewhat off-center, that overlaps both ovals. Alternatively, download the template I created for this tag.
2. Highlight the upper oval & fill with background of choice (paper 13). You will be prompted to change the vector layer to a raster type layer. Repeat with the lower oval.
3. Highlight the heart layer & select text (Beth’s Cute HMK 16), making sure the text icon is the ‘A’ with the curve & enter main text as shown in the tag.
4. Activate Fill tool, but do not change your selected fill from text colour to background choice (paper 8) until after you have clicked on the heart & been prompted to change the vector layer to a raster layer. Then fill heart with the background.
5. Choose a flower element (element 30), copy, paste, & resize as needed. Adjust opacity to 80%.
6. Choose one of the 2 posers (element 35) or a poser or tube of your choice. Copy, paste, & resize the poser as needed.
7. Return to text & your text colour to enter name (Beth’s Cute HMK 20). Use a smaller font to enter tag information (Arial 3).
8. Merge visible & save.

Enjoy.

Wednesday, July 22, 2009

baby layouts & quick page freebie


I've been wanting to do some special baby layouts & I finally found the kit for the one layout I had in mind - Ginavere Designs' "Our New Baby"


I have a special layout designed for people who have lost a baby to miscarriage or stillbirth. This was the layout I was so fussy about, rejecting most baby kits, including 2 I've designed myself. I've set this layout as a special download.

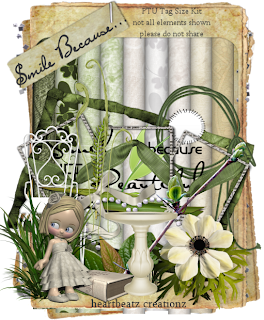
I also made the Little Sweetie layout into a quick page freebie for you.

Enjoy

Tuesday, July 21, 2009

Dance to the Rhythm of Life" tag

I've been really sick, but I did get a new tag with tutorial done. I used a gorgeous kit by A Tagger's Scrap called "Amour de Rose d'Or"

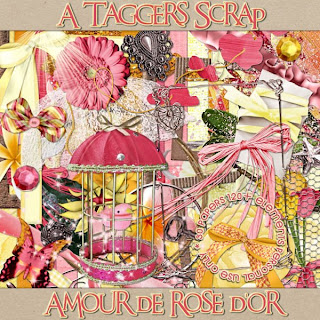
Tutorial for “Dance to the Rhythm of Life” tag

What I used:
Gorgeous Tag kit by A Tagger’s Scrap called “Amour de Rose d’Or”
http://sophisti-scraps.com/index.php?main_page=product_info&cPath=1_85&products_id=1031
Free poser courtesy of Jenne’s Treasures http://treasures.msjenne.com
Paint Shop Pro XI
What I did:
(Make sure pick tool is available on toolbar for easy resizing of elements.)
1. Open a new transparent canvas 700 pixels x 700 pixels.
2. Use preset shapes to create a heart. Fill with background of choice (paper 6).
3. Choose an element to go in the upper left corner of heart. I used the birdcage, but one of the ribbons could also work. Copy, paste & resize as needed.
4. Copy & paste your poser or tube of choice (jenne 28), resizing as necessary.
5. Copy, paste & resize butterfly.
6. Choose a flower or flowers (flower 17). Copy, paste, resize as needed, & position as desired.
7. Enter desired text. I used Carmine Tango size 12 in a colour from the birdcage for the wording, but used size 22 with bold & italics for the name. Use a smaller font for the tag information (Arial 3).
8. Merge visible & save.

Enjoy

Thursday, July 16, 2009

Miss Bee Hiven

This post features the second kit in Digicats (and Dogs) new series, a cute called Miss Bee Hiven.
I did 2 layouts, one of which I made into a quick page, & a tag with tutorial.

Tutorial for “Bee My Honey” tag

What I used:
An adorable new tagger size (300 dpi) kit from Digicats (& Dogs) called “Miss Bee Hiven” which includes 2 delightful posers http://www.scrappetizing.com/store/index.php?main_page=product_info&cPath=65_194&products_id=1336
Adobe Photo Shop Creative Suite 4.0
(For ease in resizing make sure Show Transform Controls is checked. In PSE the equivalent is Show Bounding Box, while in PSP make sure your Pick tool is operative, then simply adjust item size by moving the corners of the box around it.)

What I did:
1. Open a blank transparent canvas 600 pixels x 600 pixels & used preset shapes to draw a large heart. Open the paper of choice (paper 8), & use define pattern to make it available as fill. 2. Fill the heart shape with the background paper by using new fill layer making sure use previous layer to create clipping mask is checked.
3. Choose an element as supplementary background. I chose the sunflower cluster. Copy & paste the element into the center of your tag, adjusting size as desired & using the lasso tool to trim as necessary. Set opacity to 80% or to whatever setting fades your element slightly into your background.
4. Choose a bird (tweeter 3), then copy, paste, & resize as needed. Position as desired, in this case, perched upon the fencepost of the sunflower element. Apply bevel & emboss effect or an equivalent effect. (I use hard edge in PSE & inner bevel>bead in PSP.)
5. Choose a bee element (bee 1). Copy & paste, resizing as necessary. Position on a flower near the top, especially if you plan to copy this tag exactly since the bee also serves the wording, as a substitute for the word ‘be’. Apply bevel & emboss effect to the bee.
6. Choose a honey pot (honey pot 2). Copy & paste, resizing as necessary. Apply bevel & emboss effect. When positioning this element, keep in mind that the word ‘honey’ on the element completes the planned wording of the tag.
7. Copy & paste your poser of choice. I chose Hon E. Bear 1 from the kit, but any appropriate poser will do. (*If you use a poser from outside the kit, remember to add appropriate credit information to your finished tag.) Resize as needed, positioning as desired. Apply bevel & emboss effect, followed by drop shadow effect.
8. Enter desired text upon the tag. I used Palermo 10 because it looked harmonious with the ‘Honey’ on the pot. Use a smaller font to add tag information near the bottom of the tag. (See * above.)
9. Merge visible & save.

Enjoy.


Fox & Hound quick pages


Sometimes I get lucky. Digicats(and Dogs) has a new series of cute kits, & since I'm on CT for 2 of the stores she sells at, I got to work with both kits she has released thus far.
First off we have Fox & Hound.

I did 2 layouts & made quick pages based on those layouts, plus a tag with tutorial.

Tutorial for “Cherish Friends” tag

What I used:
Tag kit by Digicats (& Dogs) called “Fox and Hound”
http://sophisti-scraps.com/index.php?main_page=product_info&cPath=1_102&products_id=969
Adobe Photo Shop Creative Suite 4.0
(For ease in resizing make sure Show Transform Controls is checked. In PSE the equivalent is Show Bounding Box, while in PSP make sure your Pick tool is operative, then simply adjust item size by moving the corners of the box around it.)

What I did:
1. Open a blank transparent canvas 600 pixels x 600 pixels & use the circular selection tool to draw a large circle. Fill the circle with background of choice (paper 5).
2. Create a new layer & use preset shapes to draw a large paw print in the center of the circle. Fill the paw print with the background of choice (paper 3) by using new fill layer with use previous layer to create clipping mask checked off.
3. Select a grassy border (grassy border 2), copy & paste, adjusting for size. Use the lasso tool to trim the grassy border to better fit tag, if desired. Apply bevel & emboss effect.
4. Copy & paste posers, adjusting for size as needed. In this case I am using both Foxy 1& Freckles 2, which are both included in the kit. Apply bevel & emboss effect to each poser.
5. Choose a butterfly or dragonfly (dragonfly1). Copy & paste, adjusting for size as desired. Apply bevel & emboss effect.
6. Enter desired text. In this case I used Sandy Text HMK 14. From Styles>text effects2 I used white ghosted outer glow for the main words & inverse bevel with shadow for the name. If you are using a different graphics program, experiment to find an effect you like. Use a smaller font to apply tag information along the bottom.
7. Merge visible & save.
Enjoy, & stay tuned for creations from the second kit, in the next post.


Monday, July 13, 2009

HeartbeatzCreationz introducing Jacob Black

Heartbeatz Creationz has a new kit in her Twilight series "Introducing Jacob Black" http://heartbeatzcreationz.com/index.php?main_page=product_info&cPath=1_84&products_id=2405

I've done a tag, with tutorial, & I've made you a couple of quick pages.

Tutorial for tag with Introducing Jacob Black

What I used:
The latest kit by Heartbeatz Creationz in her Twilight series, “Introducing Jacob Black”
http://heartbeatzcreationz.com/index.php?main_page=product_info&cPath=1_84&products_id=2405
Poser by Medi Evil Creations http://heartbeatzcreationz.com/index.php?main_page=product_info&cPath=1_169&products_id=2398
Adobe PhotoShopCreativeSuite4

What I did:
1. Open a new transparent canvas 700 pixels x 700 pixels. Use the circular selection tool to create a large circle & fill with the desired background (paper 17).
2. Select a feather element (element 36). Copy, paste, & adjust size & position as desired. Reduce opacity to 90%.
3. Select wolf element (element 19). Copy & paste. Position in top right of circle. Adjust opacity to 66%.
4. Choose a grass element (element 27). Copy & paste, positioning at bottom of tag.
5. Copy & paste your poser of choice (Moonsong), adjusting size as desired. Apply bevel & emboss effect.
6. Choose a flower element (element 43). Copy, paste, resize as needed & position near the poser. Move one layer down to be on layer below poser. Apply bevel & emboss effect.
7. Enter your text as desired. In this case I used Tiranti Solid LET 19 & applied a style from Bel Vidotti. Use a smaller font to add tag information along the bottom (Arial 3).
8. Merge visible & save.
Enjoy.

Beach Resort quick page

Petra K has a very nice new kit, with a summer-at-the-beach vibe, called "Beach Resort".
I've done 2 layouts, making 1 into a freebie quick page.

Enjoy.

Sunday, July 12, 2009

Bee Happy

I just love doing Creative Team work - can you tell? lol
Heartbeatz Creationz latest kit is a very cheerful "Butterbee Summer" & it's 50% off!

Jay's already done some very cute quick pages that are available as an in-store freebie that I snatched up as soon as I saw them, but lucky for me, she's allowing me to make some more.
So I've done a tag, with tutorial, & 2 quick page freebies. 
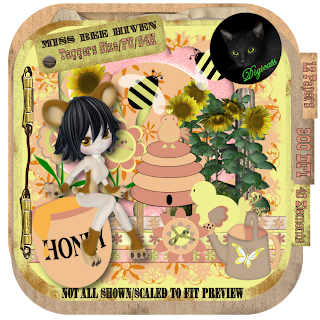
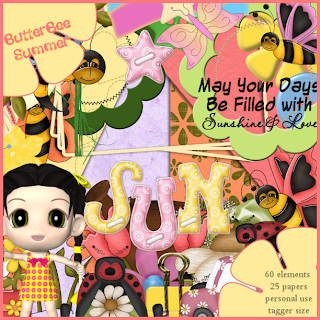
Tutorial for “Don’t Worry, Bee Happy” tag
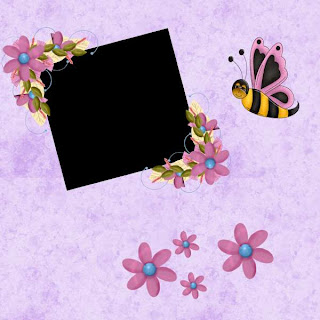
What I used:
An absolutely adorable kit by Heartbeatz Creationz called “Butterbee Summer”
http://heartbeatzcreationz.com/index.php?main_page=product_info&cPath=1_84&products_id=2377
Paint Shop Pro XI

What I did:
1. Open a blank canvas 8oo pixels x 800 pixels. Use preset shape oval to create a large oval & fill it with the background of your choice (paper 6).
2. Choose a background graphic (element 7). Copy & paste, resizing if necessary. Apply Effect>3D>inner bevel>bead.
3. Choose a bee or a butterfly (element 6). Copy & paste, resizing as needed & positioning as desired. Apply inner bevel>bead.
4. To apply text around the outside, select your colour & font & be certain that the text icon that comes up is the A with the curve. I used Baa Book HMK Bold size 14 in a bright orange. To place text inside the tag, move well away from the tag before clicking to type & move the text into place afterwards. I used size 16 for the name, in blue. Use a smaller font for the tag information (Arial 2).
5. Merge visible & save.


Enjoy.


going Dotty


JT Designs has a very cute kit called "Dotty" out right now & it's 50% off!

I had fun working with this kit! It's definitely worth the money. I made a tag, with tutorial, of course, a quick page freebie & then did 2 layouts, 1 with the quick page.

Tutorial for “Dance to the Music” tag

What I used:
Cute tag kit by JT’s Designs called “Dotty” http://www.scrappetizing.com/store/index.php?main_page=index&manufacturers_id=45&zenid=d52d845f0a4fb784d7b31c0f077ea64e
Poser from Graphics by Belle http://tech.groups.yahoo.com/group/graphics-by-belle
Paint Shop Pro XI

What I did:
1. Open a blank, transparent canvas 750 pixels x 750 pixels. Use preset shape to create a large heart & fill it with the background of choice (paper 9).
2. Select a flower or ribbon that is long & narrow (branch 2). Copy & paste, using Pick tool to adjust size, & to move to one side of the heart. Use Effects>3D>inner bevel>bead. Repeat, mirroring the placement to the other side of the heart.
3. Select a fence (fence 3). Copy, paste & adjust for size, placing in the lower portion of the heart. Apply inner bevel>bead effect.
4. Select a flower (mini flower1 & 2). Copy, paste, adjust for size as needed & place along bottom of fence, repeating as desired.
5. Select a butterfly (butterfly 7). Copy, paste, & adjust for size, placing near the cleft in the heart. Apply inner bevel>bead effect.
6. Copy & paste the poser or tube of your choice (Gummie5, with flower recoloured to match tag), adjusting for size as needed.
7. Create text in the colour & font desired. In this case, I used Candice 12 & applied the inner bevel>bead effect. Use a smaller font (Arial 3) to place tag information along the bottom.
8. Merge visible & save.

Enjoy.

Friday, July 10, 2009

Looking ahead to Fall


Apparently it's already been a long, hot summer in Texas, because one of my fellow designers is already dreaming of the coolness autumn will bring. She has created a cute folk art flavoured kit called "It's Fall, Y'all" http://digifoxsstudio.net/store/index.php?main_page=product_info&cPath=1_50&products_id=899 & it's currently on sale for 65% off!


You may want to grab it now so you're prepared for all those fall photos when they come along.

To get you started, I've made 2 quick pages for you from the kit & it was fun.
Enjoy.


Vacation - Kids


I've scrapped the vacation photos of a fellow designer, Laura of Laura's Designs. For 3 of the photos I used her new kit "Vacation Kids" http://heartbeatzcreationz.com/index.php?main_page=product_info&cPath=1_109&products_id=1753 
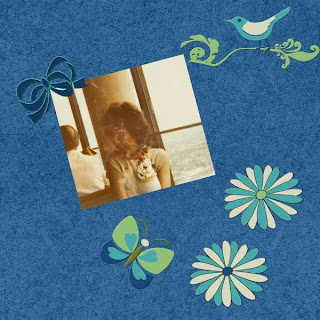
and for 1 photo, of her & her hubby, I used a freebie kit from her blog, her contribution to the summer twilights blogtrain http://bitznbobzbyloz.blogspot.com/2009/06/summer-twilights-blog-train.html

Vacation Kids is a fun kit & there were many elements to choose from, but I wanted to keep the photos the main focus; I didn't even realize until after I finished that I had only used elements in 1 layout! Sorry about that, Laura. Hope you like the layouts anyway.
If you've got vacation photos with your kids to scrap, I highly recommend this kit.
Enjoy.