Tuesday, November 24, 2009
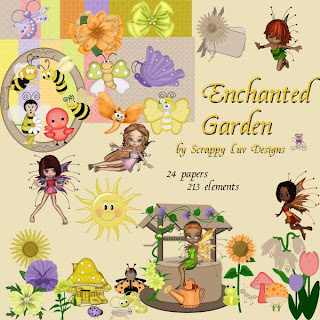
Enchanted Garden Mushroom 11
http://www.4shared.com/file/158703593/f921431e/mlc_enchanted_garden_mushroom1.html
I've checked the download & it's fine
I appreciate everyone's patience with the problems I've had getting this kit to you.
Monday, November 23, 2009
hoping 3rd try is the charm
http://www.4shared.com/file/158296031/81080ba3/enchanted_garden01.html
http://www.4shared.com/file/158298548/51819018/enchanted_garden02.html
http://www.4shared.com/file/158300423/92331d1a/enchanted_garden03.html
http://www.4shared.com/file/158301879/be379e40/enchanted_garden04.html
http://www.4shared.com/file/158305017/8ea4d22e/enchanted_garden05.html
http://www.4shared.com/file/158309107/dcab36e0/enchanted_garden06.html
http://www.4shared.com/file/158309934/609c6521/enchanted_garden07.html
http://www.4shared.com/file/158311098/64c0fb50/enchanted_garden08.html
http://www.4shared.com/file/158312208/a4333b99/enchanted_garden09.html
http://www.4shared.com/file/158313786/35253918/enchanted_garden10.html
I've checked these to make sure they work.
Enjoy.
New Link for Enchanted Garden
I apologize for the inconvenience.
DSO colour challenge - Enchanted Garden

Wednesday, November 11, 2009
quick page, tag & tut
 Creationz by Jo has a cute new kit wonderful Time of the Year
Tutorial for “Have a very merry season” tag
What I used:
Kit from Creationz by Jo “Wonderful Time of the Year”
http://digifoxsstudio.net/store/index.php?main_page=product_info&cPath=1_93&products_id=1587 (full size)
http://digifoxsstudio.net/store/index.php?main_page=product_info&cPath=1_93&products_id=1586 (tagger size)
Poser by Medi Evil Creations
http://tkoscraps.com/store/index.php?main_page=product_info&cPath=33_125&products_id=2716
http://medievilsaddiction.blogspot.com
Adobe Photoshop Creative Suite 4
(Make sure “show transform controls” is checked to allow for easy resizing of elements.)
What I did:
1. Open a new transparent canvas 700 pixels x 700 pixels. Fill with background of choice (paper 12).
2. Choose an element to decorate the top of the tag (garland-element 94). Copy, paste, resize & position as desired.
3. Copy & paste Christmas tree (element 85), resizing as needed & centering in tag. Apply bevel & emboss effect.
4. Choose poser (Joie 1). Copy & paste, resizing as needed, & positioning off to side of the tree. Apply bevel & emboss effect.
5. Choose elements you want to place under the tree (elements 7, 8, 9, 82, 93, 94). Copy, paste, resizing & positioning as desired.
6. Enter desired text (Christmas Card 18 http://haroldsfonts.com). Use a larger size (20) for the name & a smaller size (6) for the tag information.
7. Merge visible & save.
Enjoy.
Monday, November 9, 2009
So Bad It's Good tag


Tutorial for “So Good It’s Bad” tag
What I used:
Tag kit by Naughty Angel’s Creations Leather N Lace http://digifoxsstudio.net/store/index.php?main_page=product_info&cPath=1_107&products_id=1583
Poser by Med evil Creations http://tkoscraps.com/store/index.php?main_page=product_info&cPath=33_125&products_id=2375
http://medievilsaddiction.blogspot.com
Paint Shop Pro XI with pick tool activated for easy resizing of elements
What I did:
1. Open a new transparent canvas 700 pixels x 700 pixels.
2. Use circular selection tool to create a circle. Fill with background of choice (paper 1).
3. Select a background element. I used a cracked heart (element 62). Copy & paste, positioning in the center, adjusting for size as needed. Apply drop shadow (Effects>3D effects>drop shadow).
4. Select a corset (element 8). Copy & paste, resizing as desired. Apply drop shadow.
5. Choose a poser (Jessyka 4). Copy & paste, resizing as desired, & positioning to the side. Apply drop shadow.
6. Select other desired elements (element 20-heart, element 26-lipstick). Copy & paste, adjusting & positioning as desired. Apply drop shadow to the elements.
7. Apply text in chosen font (Cataneo 12). Use a smaller font size (4) for tag information.
8. Merge visible & save.
I love how it turned out. Hope you like it.
Enjoy


