Thursday, April 29, 2010

The Magic of Dance


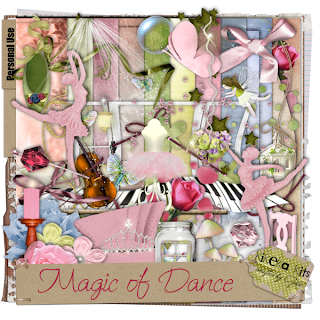
Gina aka Kikeka kits has a lovely scrap kit out called Magic of Dance.You can click on either the image or the highlighted title above to be taken straight to the kit.
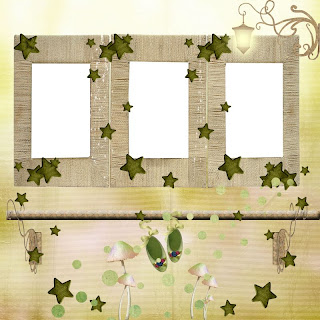
I've made you a freebie quick page to download & I've done 2 tags with accompanying tutorials.


Tutorial for “Reach For Your Dreams” tag

What I used:
Lovely scrap kit from KiKeKa Kits called Magic of Dance
http://www.scrappinbratz.com/shoppe/index.php?main_page=product_info&cPath=19_32&products_id=3648
Poser by Lassie’s Designs http://lassiesdesigns.com (I used a PTU poser from her club membership; please do not use this poser without purchasing it. Lassie also offers an amazing selection of FTU posers.)
Adobe Photoshop Creative Suite 4 (make sure “show transform controls” is checked for easier resizing of elements).

What I did:
1. Open a new transparent canvas 700 pixels x 700 pixels. Use the circular selection tool to create a circle & fill with the background of your choice (paper 3).
2. Choose one of the ballerina silhouettes (ballerina 1), copy & paste, positioning a little of center & resizing as necessary. Adjust opacity to 60%.
3. Select other elements (light, beads), copy & paste, resizing as needed & positioning as desired.
4. Copy & paste your poser/tube of choice (LDmct40b), resizing if needed & positioning as desired. Apply bevel & emboss effect so poser/tube stands out a bit.
5. Choose your font & enter your desired text. (I used Freebooter 18.) Remember to use a small font to enter tag information like poser creator, license number if applicable, & tag creator.
6. Merge visible & save.

Tutorial for “Magic of Dance” tag 2

What I used:
Lovely scrap kit from KiKeKa Kits called Magic of Dance
http://www.scrappinbratz.com/shoppe/index.php?main_page=product_info&cPath=19_32&products_id=3648
Poser by Lassie’s Designs http://lassiesdesigns.com (I used a PTU poser from her club membership; please do not use this poser without purchasing it. Lassie also offers an amazing selection of FTU posers.)
Adobe Photoshop Creative Suite 4 (make sure “show transform controls” is checked for easier resizing of elements).

What I did:
1. Open a new transparent canvas 700 pixels x 700 pixels. Use the circular selection tool to create a circle & fill with the background of your choice (paper 7).
2. Choose a background element (violin), copy & paste, resizing as needed & positioning approximately at center of tag, adjusting the opacity to 65% or whatever looks good with your choice of background paper.
3. Choose other elements (piano, butterflies). Copy & paste each element separately, resizing as needed, & positioning as desired. Make whatever creative choices seem appropriate. For example I allowed the piano keyboard to overlap the circle without trimming & then applied a bevel & emboss effect. I duplicated & mirrored the butterflies.
4. Copy & paste your poser/tube of choice (LDmc10b9b), resizing as needed & positioning as desired. Apply a bevel & emboss effect.
5. Use font of choice to enter desired text. In this case I used Babylon 14 with a Fruit Cocktail bevel 3 from Krissy’s Scraps applied. Use a smaller size font to enter tag information.
6. Merge visible & save.

While I used cu PTU poser tubes from Lassie's membership club, she also has an extensice collection of pu FTU poser tubes that is well worth any taggers time to check out!
http://lassiesdesigns.com

Enjoy

Monday, April 26, 2010

May 2010 desktop calendar

May 2010 desktop calendar
I used In Spring, a freebie kit from Fantasy Moments
http://fantasymoments-scraps.blogspot.com/
check out her blog - she has fantastic freebies!
Enjoy.

Wednesday, April 21, 2010

DSO colour challenge - Vintage Memories


Well, I stared at the colours for April's colour challenge at DSO for a week & a half before I got a spark of an idea, but once I had that spark I coaxed it into another multiple download kit. It's created at 300dpi, although I forgot to check the dpi of a couple items made from greyscaled templates until after the kit was finished & zipped, so some 72 dpi items (the hankies & the lamps) snuck in. Personal use applies as per my TOU. The papers are made from original patterns I created, & most of the patterns in the elements are original work as well.
MediEvil Creations came out with this set of posers while I was working on the kit & I couldn't resist buying them & putting a few into the kit for any of you who like to tag. Her terms of use are included inside the posers folder - please abide by them.
Download links: Main Folder
The folder link worked when I tested it, but after last month, I decided it's safest to post the individual file links as well, right from the start.
I appreciate all the people who took the time to say thank you for last month's kit. It really does help encourage me to keep going & investing in supplies & mking freebie kits for you, so please, if you download, take the time to leave a brief comment, either with the blog entry of in my chat box.
Enjoy.

Friday, April 16, 2010

Spring Fling


Baby V Designs has a new kit, complete with posers by Medi, called "Spring Fling" available in both full and tag size.
Isn't it gorgeous!
I've made you a set of quick pages. I couldn't decide which version of quick page 1 to use, so I've included both versions, with & without sentiment. I also made a tag & finally got the tutorial written. My vision has been a bit extra blurry lately.


Tutorial for “Good 2B Friends” tag

What I used:
Scrap kit from Baby V designs called Spring Fling
http://yourscrapaddiction.com/index.php?main_page=product_info&cPath=1_132&products_id=2122 (full)
http://yourscrapaddiction.com/index.php?main_page=product_info&cPath=1_132&products_id=2123 (tag)
Posers by Medievil Creations http://medievilcreations.blogspot.com are included in the kit
Adobe Photoshop Creative Suite 4.0

What I did:
1. Open a new blank canvas 700 pixels x 700 pixels. Use circular selection tool to create a circle & fill with background of choice (paper 5).
2. Choose a background element (fence2), copy & paste, resizing as necessary, & positioning as desired. Trim any portion of the element that overlaps the circle’s edges using the eraser. Apply bevel & emboss effect.
3. Choose other elements to position around the background element. I used flowers 1-4, duplicated twice apiece. I also used grasshopper1, ladybug1, & bee1 & applied a bevel & emboss effect to each of these.
4. Choose desired poser(s). I used Lani5 & Liliay5. Copy & paste poser(s), resizing as needed & positioning as desired. Apply bevel & emboss effect.
5. Enter desired text. I used Palatino Linotype 12. Use a smaller font size for tag information.
6. Merge visible & save.

Enjoy

Wednesday, March 31, 2010

Quick Page set & tag with Yesterday's Love


If you follow my blog you know I am always extra happy to work with certain designers' new kits because I like everything they make. One such designer is Jane aka JT's Designs. Yesterday's Love is a gorgeous kit & even comes with 4 posers. Check out her blog for a list of the many stores where her work is available.
I've made you a set of 2 quick pages & done a tag with tutorial.

Tutorial for tag with Yesterday’s Love

What I used:
Scrap kit by JT’s Designs called Yesterday’s Love. (See her blog
http://www.jtsdesigns.blogspot.com/ for a list of her stores.)
This kit includes 4 posers by 3 different designers. I used the poser from Outlaw by Design.

Adobe Photoshop Creative Suite 4.0. Make sure “show transform controls” is checked to allow easy resizing of elements.

What I did:
Start with a new transparent canvas 700 pixels x 700 pixels. Use circular selection tool to create a circle. Fill with background of choice (paper 8).
Choose a background element (clock). Adjust opacity to 70%.
Optionally choose a decorative element. I chose trim. Copy & paste your choice, resizing appropriately. In the case of this trim I moved the 2 pieces to a layer below the clock, kept the trim layers highlighted in the layers palette, & erased the portion that went directly beneath the clock.
Copy & paste your poser of choice (outlaw by design ft254), adjusting for size. Apply bevel & emboss effect.
Copy & paste an element of your choice (rusty heart), resizing as needed. Apply bevel & emboss effect.
Enter desired text. I used old script font for the main wording, curved it & then applied a style (TST cherry chocolate glitters style 2). To make the text curve, right click the text in the layers palette & choose “warp text”, altering the settings to taste. For the name on the tag I used renaissance font & applied a gold style from Karen Stimson. Use a simple font (Arial) in a small size for tag information.
Merge visible & save.

Enjoy.

Wednesday, March 24, 2010

DSO colour challenge - Hop Into Spring

Hop Into Spring - link list below
I've been having trouble designing lately because running scripts & actions is triggering absence seizures which leave me needing a nap. I really wanted to get a kit done for this month's colour challenge at DSO though, so I worked a bit at a time over the last 2+ weeks. Working sporadically, just thinking "oh, this would go nice", I lost track of the kit's size - consequently, it's one of my largest (if not the largest) kits ever. I know it will take some time to download, but I worked really hard, & I think it's worth the trouble. I hope you all agree.
I finally figured out how to put all the kit's files into a folder on 4shared & give you a single link to that folder - I've tried before, but this time I figured out how to get a functioning link (although my first attempt produced an invalid link) - I tested the link to be sure!
If you take the time to download, please also take a moment more to leave a comment, either under this post, or in the Shout box - right now I really need the encouragement.
Hope you like the kit & are having a good month - I do not want to see any more white stuff on the ground for a good, long time!

OK - despite my testing the link successfully yesterday - today it doesn't work! 4shared is driving me nuts! So sorry for the problem. Back to individual links:
http://www.4shared.com/file/248812643/cf644351/mlc_Hop_Into_Spring_e01.html
http://www.4shared.com/file/248816805/c797993d/mlc_Hop_Into_Spring_e02.html
http://www.4shared.com/file/248820340/bd0f625b/mlc_Hop_Into_Spring_e03.html
http://www.4shared.com/file/248822732/b140f5e7/mlc_Hop_Into_Spring_e04.html
http://www.4shared.com/file/248825975/dc01b0f3/mlc_Hop_Into_Spring_e05.html
http://www.4shared.com/file/248828197/50f57534/mlc_Hop_Into_Spring_e06.html
http://www.4shared.com/file/248831462/e1a439a5/mlc_Hop_Into_Spring_e07.html
http://www.4shared.com/file/248834714/721e443c/mlc_Hop_Into_Spring_e08.html
http://www.4shared.com/file/248835917/59355fe9/mlc_Hop_Into_Spring_e09.html
http://www.4shared.com/file/248838952/bf59b6bf/mlc_Hop_Into_Spring_p01.html
http://www.4shared.com/file/248843309/3d4a45b5/mlc_Hop_Into_Spring_p02.html
http://www.4shared.com/file/248849066/9654a19f/mlc_Hop_Into_Spring_p03.html
http://www.4shared.com/file/248853271/407218c7/mlc_Hop_Into_Spring_p04.html
http://www.4shared.com/file/248858374/e6db017e/mlc_Hop_Into_Spring_p05.html
http://www.4shared.com/file/248861420/a32612fd/mlc_Hop_Into_Spring_p06.html
http://www.4shared.com/file/248864935/f551b452/mlc_Hop_Into_Spring_p07.html

Enjoy

Wednesday, March 17, 2010

April Desktop calendar & quick page

Are you ready for spring?


Are you as sick of winter as I am?


I was looking for a colourful, cheerful kit to work with & I found it in Miss Foxy's April Showers, available in both full size and tag size.

I made an April desktop calendar freebie with this kit & I love how it turned out. Then I couldn't quit playing with it, so I made you a freebie quick page too.
Bright & cheerful - hope you like them.
Enjoy.