 Heaven Dreams has a cute, summery kit called "Strawberry Kisses in both full & tag size.
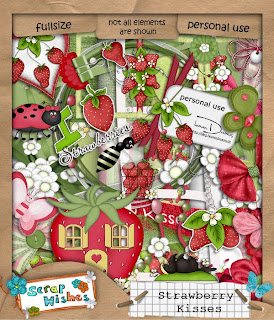

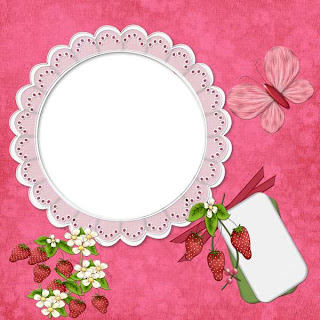
Tutorial for “So Berry Sweet” tag
What I used:
Lovely scrap kit from Heaven Dreams called Strawberry Kisses http://www.scrappetizing.com/store/index.php?main_page=product_info&cPath=65_164&products_id=728, also available in tag size http://www.scrappetizing.com/store/index.php?main_page=product_info&cPath=65_164&products_id=727
Free poser from Anita Lee Creations http://www.posertubes.com/
Adobe Photoshop Creative Suite 4.0 with show transform controls checked for easy resizing of elements
What I did:
1. Open a new transparent canvas 700 pixels x 700 pixels. Use circular selection tool to create a large circle. Fill with background of choice (paper 2).
2. Choose an element (erdbeerstrauch). Copy, paste, & resize as needed. Position as desired. Apply bevel & emboss effect.
3. Choose another element (butterfly 2). Copy, paste, resize, & position as desired. Apply bevel & emboss effect.
4. Copy, paste & resize poser or tube of choice (Kiki red02). Apply bevel & emboss effect.
5. Enter desired text. In this case I used Slash HMK Bold 18. To make the text curve, right click on the text in the layer palette, choose warp text>arch. Use a smaller font to add tag info (Arial 3).
6. Merge visible & save.
Enjoy.


1 comment:
Thank you! Your blog post will be advertised on the DigiFree Digital Scrapbooking Freebie search engine today (look for timestamp: 17 Aug [LA 07:00pm, NY 09:00pm] - 18 Aug [UK 02:00am, OZ 12:00pm] ).
Post a Comment