Monday, September 28, 2009

Sassy tag


I've done a tag with tutorial using Linda's Dream Designs tagger kit Sweet and Spicy.

The kit includes adorable posers by MediEvil Creations.


Tutorial for “Sass Is Where It’s At” tag

What I Used:
Sweet and Spicy tagger kit by Linda’s Dream Designs http://thecreativitybox.com/index.php?main_page=product_info&cPath=1_40&products_id=4201, which includes posers by Medi Evil Creations http://medievilsaddiction.blogspot.com/

Adobe Photoshop Creative Suite 4
(Make sure “show transform controls” is checked, for easy resizing.)

What I did:
1. Open a blank transparent canvas 700 pixels x 700 pixels. Use circular selection tool to create a circle & fill with background of choice (paper 7).
2. Choose a frame (frame 2), copy & paste, resizing to fit your circle. Apply bevel & emboss effect.
3. Choose a poser (Medisweet 2). Copy & paste. Apply bevel & emboss effect.
4. Enter desired text. In this case I used Succotash HMK Bold in 24 & 12 for main wording, & Pump Demi Bold LET 14 for the name. Use a smaller font (Arial 4) for tag information.
5. Merge visible & save.

Hope you like.

Sunday, September 27, 2009

DSO September challenge - earthy grace


I managed to get a kit together for DSO's September colour challenge, Earthy Grace.
Enjoy.

October 2009 desktop

Sorry it's been so long since I last posted. I've been sick with a gastro-intestinal infection & just now feeling better, thanks to the antibiotics I'm on. I've used Honored Scraps "Fall Y'All" to create an October desktop calendar for you.
Enjoy.

Monday, August 24, 2009

Live with Passion

As soon as I saw the new tagger's kit by Treasures by Terry called My Grungy Crimson Heart I knew I had to make a tag with it.

It's only 72 dpi, so it isn't suitable for any scrap pages you might want to print out, so I haven't bothered with any quick pages, sorry.

Tutorial for “Live with Passion” tag
What I used:
Tagger’s kit “My Grungy Crimson Heart” from Treasures by Terry http://butterflyblushdesigns.com/store/index.php?main_page=product_info&cPath=8_53&products_id=365
Adobe Photoshop Creative Suite 4 (have show transform controls checked for easy resizing; in PSP, have pick tool activated)

What I did:
1. Open a new transparent canvas 600 pixels x 600 pixels. Use preset shapes to create a rounded square, then select new fill layer, with use previous layer to create clipping mask checked to fill that shape with your selected background (paper 18).
2. Select a heart (heart 7). Copy & paste, centering in tag & resizing if needed.
3. There are 3 posers in kit; choose poser (cookie goth doll red 3), copy & paste poser of choice, resizing as desired.
4. Choose a butterfly (butterfly 2). Copy & paste, resizing as desired. Apply bevel & emboss effect.
5. Enter desired text in font of choice. In this case, I used Splendid 14, applied bevel & emboss effect to both main text & name, & also applied outer glow effect to the main text. Use a smaller font (3) for tag information.
6. Merge visible & save.

Hope you like it. Enjoy.

Monday, August 17, 2009

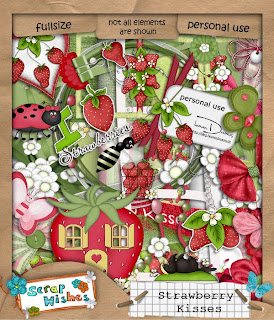
Strawberry Kisses

Heaven Dreams has a cute, summery kit called "Strawberry Kisses in both full & tag size.
I've made a set of 2 quick pages & a tag with tutorial.

Tutorial for “So Berry Sweet” tag

What I used:
Lovely scrap kit from Heaven Dreams called Strawberry Kisses http://www.scrappetizing.com/store/index.php?main_page=product_info&cPath=65_164&products_id=728, also available in tag size http://www.scrappetizing.com/store/index.php?main_page=product_info&cPath=65_164&products_id=727
Free poser from Anita Lee Creations http://www.posertubes.com/
Adobe Photoshop Creative Suite 4.0 with show transform controls checked for easy resizing of elements

What I did:
1. Open a new transparent canvas 700 pixels x 700 pixels. Use circular selection tool to create a large circle. Fill with background of choice (paper 2).
2. Choose an element (erdbeerstrauch). Copy, paste, & resize as needed. Position as desired. Apply bevel & emboss effect.
3. Choose another element (butterfly 2). Copy, paste, resize, & position as desired. Apply bevel & emboss effect.
4. Copy, paste & resize poser or tube of choice (Kiki red02). Apply bevel & emboss effect.
5. Enter desired text. In this case I used Slash HMK Bold 18. To make the text curve, right click on the text in the layer palette, choose warp text>arch. Use a smaller font to add tag info (Arial 3).
6. Merge visible & save.


Enjoy.

Wednesday, August 12, 2009

Cuddly Friends

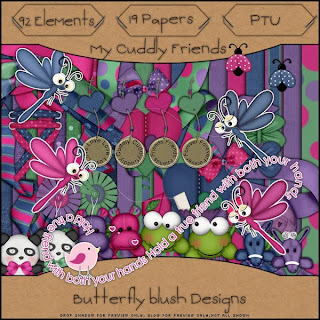
Butterfly Blush has an adorable new tag kit called "My Cuddly Friends" & it's on sale right now!
I've made a tag with tutorial & a freebie quick page.

Tutorial for “Cuddle Up” tag

What I used:
Tag kit from Butterfly Blush called “My Cuddly Friends” http://butterflyblushdesigns.com/store/index.php?main_page=product_info&cPath=8_9&products_id=354
Poser by Ithas Poser Tubes
Adobe Photoshop Creative Suite 4.0 (make certain “show transform controls” is checked for easy resizing)

What I did:
1. Open a new transparent canvas 700 pixels x 700 pixels. Use preset shapes to draw a large heart. Use layer>new fill layer with use previous layer to create clipping mask to fill the heart with background of choice (paper 2).
2. Choose a bow (bow 1). Copy & paste, positioning at top center of heart. Apply bevel & emboss effect.
3. Choose the elements that you wish to use. I chose panda 3, frog 1, hippo 1, & dragonflies 4. Copy, paste, resize as needed, & position elements around your poser of choice (cookie-pink03-itha). Apply bevel & emboss effect to each element.
4. Add text in desired colour & font. In this case I used Ottum HMK Bold 14 in a blue, with glitter 17 from Yarrow applied. Use a smaller font for tag information (Ottum HMK 03).

Enjoy.

Monday, August 3, 2009

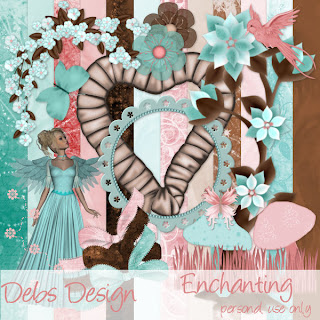
Enchanting

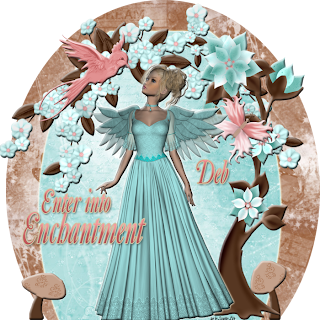
Deb of Deb's Design currently has a great deal on - you can buy her entire store & get all new products she makes from now until the end of 2009 for a low price (that's the deal I opted for) or you can get what you want of her products for 50% off. She sells at different establishments, but I picked the deal up at Butterfly Blush Designs. One of the goodies included was a kit called Enchanting.I got this idea for a special tag. It's up at the top of this post. I hope she likes it -it's a surprise!
anyway, here's the tutorial if you want to make one like it:Tutorial for “Enter into Enchantment” tag
What I used:
Kit from Deb’s Design called “Enchanting” http://butterflyblushdesigns.com/store/index.php?main_page=product_info&cPath=8_11&products_id=88
Adobe Photoshop Creative Suite 4
{Make sure “Show Transform Controls” is checked off, for easy resizing of elements.}

What I did:
1. Start with a transparent canvas 700 pixels x 700 pixels. Using the circular selection tool draw an oblong circle that exits off the bottom of the canvas, so that it appears squared off at the bottom. Fill with desired background (paper08).
2. Create new layer. Draw another squared off oblong shape the same way as in step 1, but centering it & making it somewhat shorter & narrower. Fill with desired background (paper01). Apply inner glow effect & outer glow effect to this layer. The desire is to create the appearance of an opening into a cave.
3. Select your desired elements. In this tag I used tree, shroom1, flowerbranch1, bird2, & butterfly3, as well as angel1.
4. Copy & paste tree, resizing as necessary & positioning off to one side. Apply bevel & emboss effect.
5. Copy & paste the mushroom, resizing & positioning as desired. Apply bevel & emboss effect. Repeat.
6. Copy, paste, & resize, as needed the flowering branch. Position as desired along top of “cave” so that it flows naturally. Apply bevel & emboss effect.
7. Copy & paste the bird, resizing as needed & positioning in upper left area. Apply bevel & emboss effect.
8. Copy & paste the butterfly, resizing as needed & positioning as desired. Apply bevel & emboss effect.
9. Copy & paste the poser. Resize as needed & position as desired. Apply inner glow effect & then bevel & emboss effect.
10. Choose colour & font & apply desired text & name. In this case I used CaslonNo540SwaD 24 with italics applied & then used Creative Intentionz Exquisite Style 4 which both beveled & applied glitter to the text. Use a smaller font (Arial 2) for tag information.
11. Apply visible & save.

Enjoy.