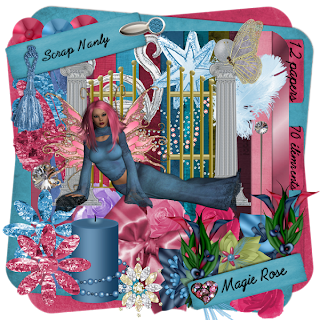
Today I got to play with a tag kit from Scrap Nanly called "Magie Rose". It's available here:

 Tutorial for “Live in the Moment” Tag
What I used:
Tag kit from Scrap Nanly called “Magie Rose” available here http://heartbeatzcreationz.com/index.php?main_page=product_info&cPath=1_133&products_id=497. You can visit Nancy’s blog at http://www.scrapnanly.blogspot.com/
Free poser by Ratanga, available at http://ratanga.yuku.com/. Please observe her terms of use.
What I did:
I used Adobe Photoshop Elements 6.0 to create this tag.
1. Begin with a transparent canvas 700 pixels x 700 pixels. Use preset shapes oval to create a large oval shape, highlight with magic wand, & fill with the background of your choice (paper 5).
2. Select a frame (frame 4). Copy & paste into the oval, adjusting size as necessary. Apply drop shadow.
3. Copy & paste the poser of your choice (mwxfr7). Layer>Arrange>Send backward. Adjust for size & position as desired. I moved the poser so that the attached copyright info would be visible.
4. Choose a flower element (image 1). Copy & paste into tag. Use Layer>Arrange to position on the layer beneath the poser. Apply drop shadow.
5. Choose your text colour, font, & size & type your text for the name. I used Sandy Text HMK Bold 14, vertical type, with the groovy FX applied for the name. Use a smaller font for the tag info along the bottom, such as Arial 4.
6. Merge visible & save.
quick page set

 Enjoy
Enjoy
created at 300 dpi it is suitable for both tagging & scrapping
check out Nancy's blog at http://www.scrapnanly.blogspot.com/

I've created a tag & written it as a tutorial & created a couple of freebie quick pages for you.
 Tutorial for “Live in the Moment” Tag
What I used:
Tag kit from Scrap Nanly called “Magie Rose” available here http://heartbeatzcreationz.com/index.php?main_page=product_info&cPath=1_133&products_id=497. You can visit Nancy’s blog at http://www.scrapnanly.blogspot.com/
Free poser by Ratanga, available at http://ratanga.yuku.com/. Please observe her terms of use.
What I did:
I used Adobe Photoshop Elements 6.0 to create this tag.
1. Begin with a transparent canvas 700 pixels x 700 pixels. Use preset shapes oval to create a large oval shape, highlight with magic wand, & fill with the background of your choice (paper 5).
2. Select a frame (frame 4). Copy & paste into the oval, adjusting size as necessary. Apply drop shadow.
3. Copy & paste the poser of your choice (mwxfr7). Layer>Arrange>Send backward. Adjust for size & position as desired. I moved the poser so that the attached copyright info would be visible.
4. Choose a flower element (image 1). Copy & paste into tag. Use Layer>Arrange to position on the layer beneath the poser. Apply drop shadow.
5. Choose your text colour, font, & size & type your text for the name. I used Sandy Text HMK Bold 14, vertical type, with the groovy FX applied for the name. Use a smaller font for the tag info along the bottom, such as Arial 4.
6. Merge visible & save.
quick page set

 Enjoy
Enjoy


2 comments:
Thank you! Your blog post will be advertised on the DigiFree Digital Scrapbooking Freebie search engine today (look for timestamp: 18 Jun [LA 07:00pm, NY 09:00pm] - 19 Jun [UK 02:00am, OZ 12:00pm] ).
Thank you so much for this Freebie. I want to let you know that I posted a link to your blog in Creative Busy Hands Scrapbook Freebies Search List, under the Quick Page(s) post on Jun. 19, 2009. Thanks again.
Post a Comment