 It's available at Heartbeatz Creationz in tagger size & full size. You can also check out her blog for all the stores she sells at.
Now on to my creations. I had such a good time with this kit.

Tutorial for “A Tag for Jacqui”
What I used:
“Rose of Desire” scrap kit by Pip’s Designs available in tagger size
http://www.posertubes.com/index.htmhttp://heartbeatzcreationz.com/index.php?main_page=product_info&cPath=1_121&products_id=1857
and full size http://heartbeatzcreationz.com/index.php?main_page=product_info&cPath=1_121&products_id=1853
Check out her blog http://pipsdezigns.blogspot.com/
free poser tube from Anita Lee Creations http://www.posertubes.com/index.htm
What I did:
I used Adobe Photoshop Elements 6.0 to create this tag.
1. Open a new transparent document 600 pixels x 600 pixels.
2. Use the heart preset shape to create a large heart in the center. Highlight the heart with the magic wand & fill with desired background (paper 11). Merge visible.
3. Copy, paste & position poser tube of choice (KikiPepper08), resizing as desired (approx. 90% of original size). Apply drop shadow.
4. Choose a rose element with a stem (single rose 3). Copy, paste, & position along the side edge of the heart.(Resize the rose to about 10% of its original size.) Apply drop shadow. Repeat & mirror the position of the rose on the opposite side of the heart.
5. Apply desired text. In this case the font is Allegro 14 with groovy FX applied. Experiment with effects as desired. Use small font (Arial 4) to add tag info along bottom.
6. Merge visible & save. Tutorial for ‘’Friends Forever’’ tag
What I used:
“Rose of Desire” scrap kit by Pip’s Designs available in tagger size
http://www.posertubes.com/index.htmhttp://heartbeatzcreationz.com/index.php?main_page=product_info&cPath=1_121&products_id=1857
and full size http://heartbeatzcreationz.com/index.php?main_page=product_info&cPath=1_121&products_id=1853
Check out her blog http://pipsdezigns.blogspot.com/
free poser tube from Anita Lee Creations http://www.posertubes.com/index.htm
What I did:
I used Adobe Photoshop Elements 6.0 to create this tag.
1. Open a new transparent document 600 pixels x 600 pixels.
2. Using either circular marquee tool or preset shape tool to create a large circle in the middle of the canvas. Fill the circle with the paper of your choice (paper 5).
3. Choose a bow from the kit (bow 2), copy & paste onto top left of circle, angling & adjusting size as needed. Apply drop shadow.
4. Copy & paste tube of choice into center of circle (CupcakeCouple03). Adjust size as necessary. Apply drop shadow.
5. Copy & paste rose of choice (rose 3), resizing to about 20-25 % of original size. Move layer down to below the tube layer.
6. Apply text as desired. In this case I used Adorable 12. Use a small font to apply text credits along the bottom of the tag.
7. Merge visible & save.
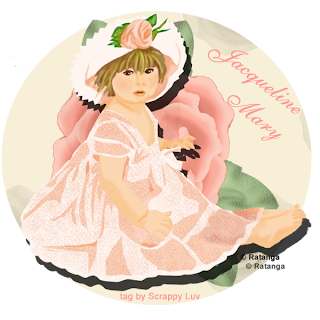
Tutorial for “Another tag for Jacqui”
What I used:
“Rose of Desire” scrap kit by Pip’s Designs available in tagger size
http://www.posertubes.com/index.htmhttp://heartbeatzcreationz.com/index.php?main_page=product_info&cPath=1_121&products_id=1857
and full size http://heartbeatzcreationz.com/index.php?main_page=product_info&cPath=1_121&products_id=1853
Check out her blog http://pipsdezigns.blogspot.com/
free poser tube from Ratanga http://ratanga.yuku.com/
What I did:
I used Adobe Photoshop Elements 6.0 to create this tag.
1. Open a new transparent document 600 pixels x 600 pixels.
2. Using either circular marquee tool or preset shape tool to create a large circle in the middle of the canvas. Fill the circle with the paper of your choice (paper 16).
3. Copy & paste rose of choice (rose 3). Adjust size as needed. Set opacity at 50%.
4. Copy & paste tube of choice (Emily).
5. Apply text as desired. In this case I used Allegro 12. Use a small font (Arial 4) to apply tag credits along the bottom of the tag.
6. Merge visible & save.
And now 2 freebie quick pages, also made from Pip's wonderful kit. Personal use only, please.

 Enjoy.


No comments:
Post a Comment