 I also made a couple of quick pages for you.
 Oh, & one other bit of news as to sales starting tomorrow - Hearteatz Creationz has a special collab available.
Enjoy.
digital scrapbooking freebies

 I also made a couple of quick pages for you.
 Oh, & one other bit of news as to sales starting tomorrow - Hearteatz Creationz has a special collab available.
 This is my first tag size kit & is available in all 3 of my stores: Heartbeatz Creationz, Butterfly Blush & DigiFox'sStudio in the Starving Artist section, starting July 1, 2009.
 Tutorial for “Oriental Beauty” tag
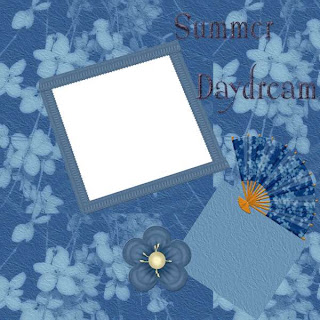 (quick page 1 is also in 2400x2400 pixel size thanks to a small goof on my part)
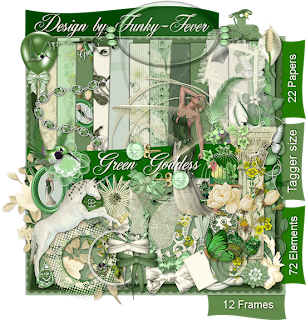 Funky Fever has a new tag kit out & I just had to play with it. You can find it here. No quick pages because the kit was created at 72 dpi, but I have 2 tags with accompanying tutorials.
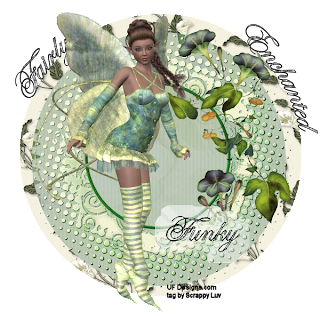
Tutorial for “Fairly Enchanted” tag
What I used:
Tag kit by Funky Fever called “Green Goddess” available here
http://butterflyblushdesigns.com/store/index.php?main_page=product_info&cPath=8_42&products_id=223
Free poser from U f designs http://ufdesigns.com/
What I did:
I used Paint Shop Pro XI to create this tag.
1. Open a blank canvas 600 pixels x 600 pixels. Use the selection tool to create a medium circle. Fill with background of choice (paper 3).
2. Choose a frame (fancy frame 2) & copy & paste onto circle.
3. Copy & paste the poser of your choice (st.pat109). Use the pick tool to adjust for size as desired.
4. Create new layer. With another background of choice loaded as both foreground & background (paper 7), use ellipse tool to draw a large circle that covers the tag.
5. Switch to text tool & click at edge of circle where you want text to begin – make sure the icon is the A with a curve shape. Change foreground to colour of choice (black) & background to colour or pattern of choice (silver glitter). Type text in font of choice (Easy Street EPS 16).
6. Move layer with this large circle & text to back.
7. Create new layer & move this layer to front. Using some font & text colour(s) type desired name. Apply Effects>3D>chisel>transparent thin. Switch to a small font & a single colour in both background & foreground to type tag information along bottom of tag.
8. Merge visible & save.
 Tutorial for “Natural Beauty” tag
Enjoy.


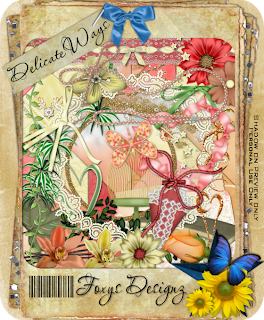
 Foxy's Designs has a lovely kit called "Delicate Ways". One look & I saw quick pages - lol. http://digifoxsstudio.net/store/index.php?main_page=product_info&cPath=1_3&products_id=503
+tag.png)
What I used:
Tag kit by Foxy’s Designs called “Delicate Ways”
http://digifoxsstudio.net/store/index.php?main_page=product_info&cPath=1_3&products_id=503
Free Poser from Outlaw by Design http://www.outlawsdesign.com/psptubes3.html
What I did:
I used Adobe PSCS 4 to make this tag.
1. Open a new blank canvas 600 pixels x 600 pixels. Use the circle marquee tool to create a large circle. Fill the circle with the background of your choice (paper 11).
2. Choose a flower (flower 7). Copy, paste & resize, centering on the tag. Adjust opacity to 60%.
3. Choose a frame (frame 3) & copy & paste onto tag, resizing if necessary. Apply bevel & emboss effect.
4. Copy & paste poser of choice, positioning in center of tag, resizing as desired. Apply bevel & emboss effect.
5. Apply desired text. I used Monotype Corsiva 48, applied bevel & emboss effect, & then satin effect. Use a smaller font for tag information (Arial 6).
6. Merge visible & save.
 Enjoy
Enjoy


 Tutorial for “The Past’s Touch of Class” tag
What I used:
Scrap kit from Angele designs called “"Vintage au féminin" or “girl Vintage”
http://thecreativitybox.com/index.php?main_page=product_info&cPath=1_249&products_id=3447
What I did:
I used Adobe PSCS 4 to create this tag.
1. Open a new transparent canvas 600 pixels x 600 pixels.
Use preset shape to draw a large heart. Decide on background. Use define pattern to enter a paper (papiere froisse 3) into your palette. Use new fill layer, checking off “use previous layer to create clipping mask”.
2. Choose the tube or poser you wish to use (sujet). Copy, paste, resize as needed & position slightly off center.
3. Choose vintage elements (carriage, broche 4). Copy & paste. Adjust size to taste & position as desired. Adjust opacity to “fade” the elements slightly into the background. Keep both elements appearing about the same opacity, even if it means using different levels. I n this case, the carriage is at 50% but the jewelry is at 60%.
4. Choose your text colour, font & font size. I used a brown lifted from the poser, Edwardian Script ITC size 10 for the saying, size 18 for the name, & then applied a glitter style. Use a smaller font for tag info along the bottom (Arial 2).
5. Merge visible & save.

 Enjoy
Enjoy

 Tutorial for “Bee-Loved” tag
What I used:
Scrap kit by Crystal’s Designs called “Beautiful Dreamer” http://digifoxsstudio.net/store/index.php?main_page=product_info&cPath=1_38&products_id=772
Graphic extracted after running a frame action by Roseli Scraps http://www.mediafire.com/?sharekey=2321a75da143a94219747bd91027d4dd2984530e1bd0ed43
What I did:
I used Adobe PSCS 4 to create this tag.
1. Open a blank canvas 600 pixels x 600 pixels. Select desired background & make it available using Edit>Define pattern (paper 2). Use preset shapes to create a large heart. Use Layer>New fill layer with “use previous layer to create clipping mask” checked & fill heart with background.
2. Choose a flower (daisy 3), copy, paste, centering & resizing as needed. Apply bevel & emboss effect.
3. Download bee graphic or use a poser or tube of your choice. Copy, paste, resize as needed & position as desired.
4. Type desired text. In this case I used Bix Antique HMK Bold, in purple, size 12 for name & size 10 for tag title, then applied a glitter style. Use a smaller font for tag information (Arial 2).
5.Merge visible & save.
 Enjoy
Enjoy.png) Sanie has graciously given me permission to share the quick page I made with one of her lovely freebie kits available here. Check out her blog, it's really wonderful.
Sanie has graciously given me permission to share the quick page I made with one of her lovely freebie kits available here. Check out her blog, it's really wonderful.

 Well, I just finished playing with the new kit from Crazed Creations "Birds & Bees", on sale now
 Tutorial for “Bee Happy” tag
.png)

Tutorial for “Dreams Take Flight” tag
What I used:
A wonderful scrap kit by Funky Fever called “Summer Time Blues” http://butterflyblushdesigns.com/store/index.php?main_page=product_info&cPath=8_42&products_id=206 (full) http://butterflyblushdesigns.com/store/index.php?main_page=product_info&cPath=8_42&products_id=204 (tagger)
The lovely poser is included in the kit.
What I did:
I created this tag in Adobe PSCS 4.
1. Open a new, transparent canvas, 700 pixels x 700 pixels. Use the circular selection tool to draw a large circle. Fill the circle with the background of your choice (paper 11).
2. Choose one of the 2 butterflies. I chose the second butterfly. Copy & paste, resizing smaller to fit nicely in upper half of your circle. Adjust opacity of butterfly layer to 80%.
3. Copy & paste the gazebo, resizing to about 10% of original size. Adjust opacity of gazebo layer to 70%.
4. Copy & paste the poser, resizing so she can stand off to one side & not substantially block other elements. Apply bevel & emboss effect, then apply drop shadow.
5. Choose text colour, font & font size. I used dark blue Lauren Script size 18 for the name & size 14 for the other text, & then applied a glitter style. Use a smaller font to type tag info along bottom (Arial 3).
6. Merge visible & save.
.png) Enjoy.
Enjoy.

Tutorial for “Mama Raised A Lady” tag
What I used:
Always a Lady scrap kit by Scrappy Luv available at Heartbeatz Creationz, Butterfly Blush, and Digifox’s Studio.
Tube by Erica Currey http://sugarpencil.com/. You must have a license to use her work, which may be purchased here http://www.mypsptubes.com/.
What I did:
I used Adobe PSCS4 to make this tag.
1. Open a new canvas, 600 pixels x 600 pixels, transparent background.
2. Use either circular marquee tool or preset shape to draw a large circle in the center of your canvas. Fill with your choice of background (paper 02).
3. Choose a parasol (parasol 02) & copy & paste onto canvas. Adjust for size as needed, tilt slightly & align with top portion of circle. Apply drop shadow.
4. Choose a fan (fan 02). Copy & paste onto canvas. Adjust for size as needed. Tilt slightly, place along bottom of circle. If desired use lasso tool to select strings hanging from handle of fan & delete. Apply drop shadow.
5. Select the tube or poser of your choice, copy & paste in center of canvas. Adjust for size as needed. Apply drop shadow.
6. Choose a flower (flower 17). Copy, paste, adjust for size as needed & position where desired (top left). I did not apply drop shadow in this case, but you may, if you wish.
7. Select your font & type desired text. I applied a satin FX & slight bevel to the text. (I forgot to record the font prior to applying the effects, & the software changed the layer to no longer be editable type, so the font does not display, sorry.) Use a smaller font to apply tag information along bottom edge.
8. Merge visible & save.
I also made a quick page with Always a Lady. I had a particular vintage family photo in mind when I created it & now I just have to bug my cousin into giving me a copy of that photo!  I also snagged a really cute kit by Reeces Scrap Pieces on sale at a very low price. The frogs in "Daisy Crazy" are going to make you smile. Visit April's blog for a complete list of her stores & pick up some cool freebies http://reecesscraps.blogspot.com/. I couldn't resist playing with this one so I made a tag, with tutorial & a quick page for you to download (all 3 quick pages are in the same download file but not zipped together).
 Tutorial for “Hoppin’ Hello” tag
What I Used:
An adorable scrap kit from Reece’s Scrap Pieces called “Daisy Crazy” available here
http://heartbeatzcreationz.com/index.php?main_page=product_info&cPath=1_89&products_id=1943
Check out her blog (there’s freebies) http://reecesscraps.blogspot.com/
A poser by Anita Lee, http://www.posertubes.com/, one of her wonderful freebies.
Please always read & follow terms of use.
What I did:
I used Paint Shop Pro XI to create this tag. Users of other programs may have to experiment with FX to achieve the look of the text.
1. Begin with a new transparent canvas, 800 x 800 pixels. You can make the tag smaller if you wish, either by starting smaller or by resizing when complete.
2. Use preset shapes, a flower shape (flower 5) to draw the background shape.
You can either set your desired background as both foreground & background material prior to creating the shape, or select with magic wand after creating the shape & fill with desired background (paper 7).
3. Choose a flower (daisy 8). Copy & paste onto center of canvas, adjust so flower nearly fills the canvas, but not completely. Application of drop shadow optional.
4. Choose your poser or tube (Dollie One Piece 02). Copy & paste onto tag, adjusting size & position as desired. Drop shadow may be applied if desired.
5. Choose a frog (froggy-daisy-for-you). Copy & paste, resize & position as necessary & as desired. Drop shadow is optional.
6. Choose your font & type desired text. (I used Art Brush size 18 for the name, size 12 for the theme words.) To make the words stand out I applied the following effects: Effects>3D>Cutout>Blue edge gold, modified to change the blue to the green colour of the frog followed by Effects>3D>Inner Bevel>Angled.
7. Merge visible & save.
The quick page I made with this kit is at the top of this post.
Last but far from least, a kit I've had my eye on since it came out went on sale, so I scooped it up to play with & you benefit. "Always Alice" by Baby V designs is a very nice kit, that appealed to me even though I'm not a Twilight fan. I made a tag & a quick page with this kit as well.
 Tutorial for tag with “Always Alice” kit
What I used:
A kit from Baby V designs called “Always Alice” which can be purchased here
http://heartbeatzcreationz.com/index.php?main_page=product_info&cPath=1_130&products_id=1811 for full size and tag size here http://heartbeatzcreationz.com/index.php?main_page=product_info&cPath=1_130&products_id=1812
Poser from Anita Hill Creations http://www.posertubes.com/
What I did:
I created this tag in Adobe PSCS4.
1. Start with desired background shape. In this case I used the preset shape that I would describe as a squared off star. (I have been frustrated trying to get the program to allow a preset shape to be filled with a background & finally figured it out!).
2. Choose your background. If you want to use a pattern make sure you have used Edit>Define pattern ahead of time to make the pattern(s) desired available to you. Layer>New fill layer> check the box for “use previous layer to create clipping mask”>select your fill>ok. (I used paper 3)
3. Create a new layer & use the preset shape tool to create a flower shape centered onto the tag. Follow step 2 to fill with your desired background (paper 9).
4. Choose a flower (flower 1). Copy & paste, position over flower shape & adjust size.
5.Choose a heart (heart 3) Copy & paste, resize & position as desired. Move it around until it looks good to you.
6. Choose a glitter splotch (glitter splotch 2). Copy, paste & resize. Once I had it resized to my satisfaction, I copied the resized splotch & pasted it onto the tag as well, moving both splotches about until I liked the look.
7. Copy & paste your poser or tube of choice (baby blue 03). Resize as needed & position as desired.
8. Choose a flower. I used flowers 1, 3-6). Copy, paste & resize, positioning where desired & repeating with as many flowers as you think looks good. (I have 8 flowers scattered about.)
9. Type your desire text. I used Lauren Script 20, in a purple colour & then applied a glitter FX. Use a smaller font to type tag information along bottom edge (Arial 3).
10. Merge visible & save.
Whew. That's the lot thus far. Hope you like.
Enjoy.
