
 Artlor Designs has a new kit Sweet Times http://yourscrapaddiction.com/index.php?main_page=product_info&cPath=1_126&products_id=1828
I've done 2 layouts, with matching quick page freebies.
 Enjoy
Artlor Designs has a new kit Sweet Times http://yourscrapaddiction.com/index.php?main_page=product_info&cPath=1_126&products_id=1828
Enjoy
Artlor Designs has a new kit Sweet Times http://yourscrapaddiction.com/index.php?main_page=product_info&cPath=1_126&products_id=1828 I've done 2 layouts, with matching quick page freebies.
Enjoy


 Oh my. I spotted S.W.A.K. by Digicats (and Dogs) & begged to be allowed to play with it. Happy, happy - she said yes!
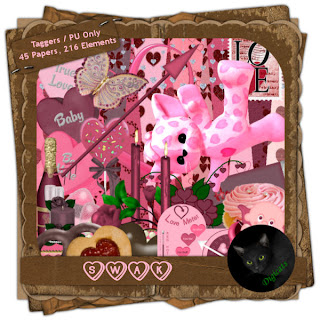

Remember all my quick pages are for personal use only.
I also made 2 tags , with accompanying tutorials.
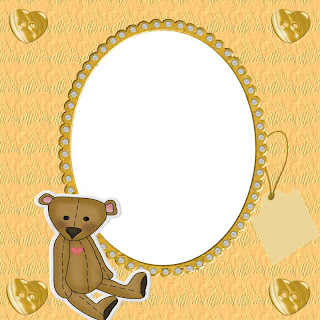
Tutorial for “Love You Beary Much” tag
What I used:
Scrap kit by Digicats (and Dogs) called SWAK http://scrappinjungle.com/index.php?main_page=product_info&cPath=1_121&products_id=820
The kit includes 3 posers by Perfect Posers http://perfectposers.com/.
Adobe PhotoShop Creative Suite 4 (Make sure “show transform controls” is checked to allow for easy resizing of elements.)
What I did:
1. Open a new transparent canvas 700 pixels x 700 pixels (I later enlarged to 800 pixels x 800 pixels to allow the outside text.) Use circular selection tool to create a circle. Fill with background of choice (paper 38).
2. Select a frame (frame 05). Copy & paste, resizing as needed, positioning at center of circle.
3. Select a decorative element (bow 08). Copy & paste, resizing & positioning as desired. Apply bevel & emboss effect.
4. Copy & paste a teddy bear (fuzzy bear 03). Resize as needed, positioning in front of the frame. Apply bevel & emboss effect.
5. Choose a candy heart for the bear to hold, if desired (candy heart 01b). Copy & paste, resizing & positioning.
6. Apply desired text. I used Fiolex Girls, a font that can be found at www.freefonts.com. Use a smaller font for tag information.
7. Merge visible & save.
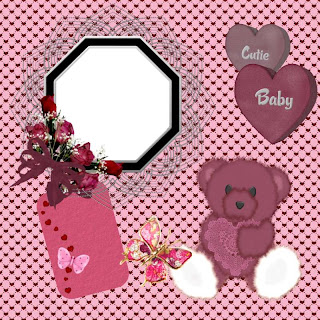
 Tutorial for “Flipped Over You” tag
What I used:
Scrap kit by Digicats (and Dogs) called SWAK http://scrappinjungle.com/index.php?main_page=product_info&cPath=1_121&products_id=820
The kit includes 3 posers by Perfect Posers http://perfectposers.com.
Paint Shop Pro XI (Use pick tool for easy resizing of elements).
What I did:
1. Open a new transparent canvas 700 pixels x 700 pixels. Use preset tool to create a heart. Fill with background of choice (paper06).
2. Choose a poser (Perfect Posers Very Pink 05). Copy & paste, resizing as necessary. Position as desired. Apply Effects>3D>Inner Bevel>8.
3. Select elements to highlight the poser (candy heart 03b & 03c). Copy & paste, resizing & positioning as desired. Apply Effects>3D>Inner Bevel>8.
4. Enter desired text. I used Fiolex Girls (Freefonts.com). Optionally, apply Effects>3D>Inner Bevel>2. Use a smaller font (Arial4) for tag information.
5. Merge visible & save.
Enjoy.


Tutorial for “Girlie Girl” tag
What I used:
Girlie Girl kit by Tinx Scraps (aka Tonie Posers) http://digifoxsstudio.net/store/index.php?main_page=product_info&cPath=1_108&products_id=1926
Paint Shop Pro XI (Use “Pick” tool for easy resizing of elements.)
What I did:
1. Open a new transparent canvas 700 pixels x 700 pixels. Use preset tool to create a heart. Fill with background of choice (paper 16).
2. Choose your photo & a frame (plain frame 3). If you don’t have a photo, copy the head & shoulders of the clipart figure in the next step. Copy & paste photo, then copy & paste the frame. Resize both as needed. Highlight photo & frame in layers palette & merge together. Position as desired & apply drop shadow.
3. Choose a clip art figure or poser (girlie). Copy & paste, resizing & positioning as desired. Apply drop shadow.
4. Copy & paste hearts 1, resizing as needed. Move layer down so that the string is behind the photo in the frame. Apply drop shadow.
5. Enter text. I used Garamond Bold Italics 18. I then applied Effects>3D>inner bevel>soft edge. Use a smaller size font for the tag information.
6. Merge visible & save.
 Tutorial for “I Love Being a Girl” tag
Enjoy
 The Valentine edition of the starving artists train is now chugging into stores & Wench Designs' contribution is a really cute tagger kit called Kupid Kitty http://thecreativitybox.com/index.php?main_page=product_info&cPath=290&products_id=4774
 The kit is created at 72 dpi, so I don't have any freebie qp for you, but I did do a layout with the kit, featuring my furry baby girl Smudge, & my brother's two furry babies. I also did 2 tags with accompanying tutorials.
 Tutorial for “Hey babe, be mine?” tag
What I’m using:
Starving Artist tag kit from Wench Designs called Kupid Kitty http://thecreativitybox.com/index.php?main_page=product_info&cPath=290&products_id=4774
Poser by Sinful Mindz http://sindfulmindz.blogspot.com
Adobe PhotoShop Creative Suite 4.0 (Make sure “show transform controls” is checked to allow easy resizing of elements.)
What I did:
1. Open a new transparent canvas 700 pixels x 700 pixels. Fill with background of choice (paper 19).
2. Copy & paste heart box 2. Resize & position as desired. Apply bevel & emboss effect.
3. Copy & paste poser of choice (maverick Cherry Luv 3), resizing as needed & positioning as desired. Apply bevel & emboss effect.
4. Choose an element for poser to hold, if appropriate (box 1). Copy & paste, resizing as necessary & positioning in or by poser’s hand. Apply bevel & emboss effect.
5. Choose a candy heart sentiment (candy heart 4). Copy & paste, resizing & positioning as desired.
6. Enter desired text. In this case I used CaslonNo540SwaD, using colours from the poser. I started font size at 14, but adjusted text size manually to be visually pleasing. Use a small font (Arial 3) for tag information.
7. Merge visible & save.
Enjoy.


