Wednesday, December 23, 2009

December DSO - Holly-Daze


Okay, I finally finished my December colour challenge kit for DSO. I hope the links behave better this month than last month. I can no longer put it all in 1 folder & just share the folder - one is supposed to be able to do that, but when I checked the link Mediafire provided, it did not work. However, the individual links do seem to work. There are 14 zips - as usual, my creating got out of hand & I tried to keep the zip sizes managable for dial-up users.
Download Links for “Holly-Daze”
http://www.mediafire.com/file/2dkzzzdnwlm/mlc_holly-daze zip01.zip
http://www.mediafire.com/file/knyzyzl1dql/mlc_holly-daze zip02.zip
http://www.mediafire.com/file/nl5dnomygmn/mlc_holly-daze zip03.zip
http://www.mediafire.com/file/zmlz1zeim2d/mlc_holly-daze zip04.zip
http://www.mediafire.com/file/kmwmx4tmq1i/mlc_holly-daze zip05.zip
http://www.mediafire.com/file/z1bgtuw1nzy/mlc_holly-daze zip06.zip
http://www.mediafire.com/file/tftnv2nhlm3/mlc_holly-daze zip07.zip
http://www.mediafire.com/file/wym2nmdmiko/mlc_holly-daze zip08.zip
http://www.mediafire.com/file/kminghnyyzz/mlc_holly-daze zip09.zip
http://www.mediafire.com/file/ykmw0zdh3ii/mlc_holly-daze zip10.zip
http://www.mediafire.com/file/ydtltzkjoym/mlc_holly-daze zip11.zip
http://www.mediafire.com/file/rrlzmznwb4q/mlc_holly-daze zip12.zip
http://www.mediafire.com/file/yzmjddndd2m/mlc_holly-daze zip13.zip
http://www.mediafire.com/file/2tuyk0yntmi/mlc_holly-daze zip14.zip
If you download, could you please take the time to say thanks or hi, either under comments or in my shout box, please? It takes a lot of time, effort, & $ spent on CU items to produce a kit like this, & the comments help make it worth doing.
Enjoy & have a safe, happy holiday.

Friday, December 18, 2009

Roses & Lace


Remember a couple of posts ago, I mentioned hoping to use "Roses & Lace" by Crystal's Designs to make a February desktop? Well, great news - she sent it to me! It comes in both tag & full.
It's gorgeous. I made the desktop, 2 quick pages & a tag with tutorial. In other words, I had fun.

Tutorial for “Life Is Beautiful” tag

What I Used:
Scrap kit by Crystal’s Designs “Roses & Lace”
http://digifoxsstudio.net/store/index.php?main_page=product_info&cPath=1_38&products_id=1546 (tag)
http://digifoxsstudio.net/store/index.php?main_page=product_info&cPath=1_38&products_id=1545 (full)
Poser by MediEvil Creation http://medievilcreation.blogspot.com
Adobe Photoshop Creative Suite 4.0
(Make sure “show transform controls” is checked to allow easy resizing of elements.)

What I Did:
1. Open a new transparent canvas 800 pixels x 800 pixels. Use the circular selection tool to create a circle & fill with background of choice (paper 5).
2. Select a background element (doily 3). Copy & paste, resizing as needed, position in center, & apply bevel & emboss effect.
3. Copy & paste poser of choice (Medi-beauty 2), resizing if necessary, & positioning in the canter of tag. Apply bevel & emboss effect.
4. Select a flower element (rose 4). Copy & paste, resizing as needed, & positioning to one side, then applying bevel & emboss effect. Repeat & place second flower on opposite size.
5. Enter desired text. I used Tudor 18. To curve text, right click on text in layer palette>warp text>arch. Apply bevel & emboss effect. I also applied a glitter effect (TST-chocolate cherry-glitter styles). Use a smaller font for tag information (Arial 4).
6. Merge visible & save.

Enjoy

Winter Wonderland

Sue aka Wacky Winnie Designz has a huge & gorgeous kit newly released called Winter Wonderland. With 32 papers & 90 elements, there is a lot that you can do with this one!! My goodies for you are just a small taste. Comes in full and tag size, both at 300 dpi.
I've made you 2 quick pages & a tag with tutorial.

Tutorial for “Cuddle Up” tag

What I Used:
Lovely scrap kit by Wacky Winnie Designz called “Winter Wonderland”
http://digifoxsstudio.net/store/index.php?main_page=product_info&cPath=1_102&products_id=1675 (full)
http://digifoxsstudio.net/store/index.php?main_page=product_info&cPath=1_102&products_id=1674 (tag)
Poser by MediEvil Creations http://medievilcreations.blogspot.com
Adobe Photoshop Creative Suite 4.0
(Make sure “show transform controls” is checked for easy resizing of elements.)

What I Did:
1. Open a new transparent canvas 700 pixels x 700 pixels. Use circular selection tool to create a large circle & fill it with background of choice (paper 31).
2. Choose a frame or wreath element (heart frame 1). Copy & paste, resizing as needed, & positioning about the center of the tag. Apply bevel & emboss effect.
3. Choose a poser in a seated position (Medi-amalia5), copy & paste, resizing as needed, & positioning seated in frame (or wreath). Apply bevel & emboss effect.
4. Choose a snow puppet (snowpuppet 1). Copy & paste, resize & position upon poser’s lap. Apply bevel & emboss effect.
5. Enter desired text in chosen colour. I used a deep gray-blue & Adorable 12. Apply bevel & emboss effect. Use a smaller font size for tag information.
6. Merge visible & save.

(Still waiting for computer repair.)

Enjoy

Wednesday, December 16, 2009

Cool (Cute) Yule

When I saw the cute birds in Krazy Mom Designz "Cool Yule" kit, I wanted to use them to scrap the latest photos of my friend's adorable little girl. I recoloured everything to suit my photos with Kelli's permission. Then I made a tag & tut with the kit.

Tutorial for “Tweet Yuletide Greetings”

What I used:
“Cool Yule” kit by Krazy Mom Designz
http://yourscrapaddiction.com/index.php?main_page=product_info&cPath=1_176&products_id=1283
Adobe PhotoShop Creative Suite 4
(Make sure “show transform controls” is checked to allow easy resizing of elements.)

What I did:
1. Open a new transparent canvas 700 pixels x 700 pixels. Use circular selection tool to create a circle & fill with background of choice (paper 2).
2. Choose snowflake element. Copy, paste, & resize. Repeat. Use lasso tool to select larger dark snowflake of second set, choose edit>clear. Position snowflakes at top of circle. Apply bevel & emboss effect.
3. Choose a bird (bird 2), copy & paste. Apply bevel & emboss effect.
4. Enter desired text. I used Kingthings Christmas 12. Apply bevel & emboss effect. Use smaller font size (8) for word “from” & (4) for tag information.
5. Merge visible & save.

Enjoy

Tuesday, December 15, 2009

SnoFriends

My computer is probably going into the shop tomorrow (& I will go into withdrawal symptoms).

More snowmen today, this time courtesy of Baby V Dezign & her Winter SnoFriends kit, available in both full & tag size. Visit her at http://babyvdezign.com/ for a list of vendors.
I've made 2 quick pages & a tag with tutorial.

Tutorial for “Winter Blessings” tag

What I used:
“Winter Sno Friends” kit from Baby V Dezign, available in both full & tag sizes. Visit her blog http://babyvdezign.com for a list of stores.
Poser from Medi Evil Creations http://medisaddiction.blogspot.com
Adobe Photoshop Creative Suite 4
(Make sure “show transform controls” is checked to allow for easy resizing of elements.)

What I did:
1. Open a new transparent canvas 700 pixels x 700 pixels. Use circular selection tool to create a circle & fill with background of choice (paper 7).
2. Choose word art (word art 3). Copy & paste, positioning along edge of circle, adjusting size as needed.
3. Choose a holly element ((holly 2). Copy & paste, adjust for size & position at one end of word art. Repeat & position at other end of word art.
4. Choose a tree element (snowtree). Copy & paste, resize as needed & position in center of tag.
5. Choose snowman elements (snowman 1 & snowgirl 1). Copy & paste, positioning one on each side of tree, & apply bevel & emboss effect to each.
6. Copy & paste your poser of choice (Medi-andalia5), resizing as needed & positioning between the snowmen. Apply bevel & emboss effect.
7. Enter desired text. In this case I used Cataneo BT 12. Use a smaller font for tag information.
8. Merge visible & save.

Enjoy.

Monday, December 14, 2009

Winter Magic

I'll admit it - there are certain designers whose work I really love working with. Crystal's Designs is one of those designers & right now she has 3 new kits out I love. I picked Magical Winter as a CT for digifox studios & that's the one I'll feature in this post, but I couldn't resist purchasing her Let It Snow kit! I'm definitely going to be playing with it too, unless the repairman comes for my computer. I really hope I get to work with her Roses & Lace kit, I think it would make a lovely desktop calendar for February.So I made you a freebie quick page, a desktop calendar freebie for January 2010, & a very fast, simple tag you can easily make.
Have I mentioned I love snowmen? I have a collection that I try to add a piece to every year. I even like to collect scrapbooking snowmen. The tag I made from this kit is very simple, but also very cute.

Tutorial for “Sno’ Better Time For Fun” tag

What I used:
Kit by Crystal’s Designs called Winter Magic
http://digifoxsstudio.net/store/index.php?main_page=product_info&cPath=5_26&products_id=1632 (tag)
http://digifoxsstudio.net/store/index.php?main_page=product_info&cPath=1_38&products_id=1631 (full)
Paint Shop Pro XI
(Make sure pick tool is enabled, for easy resizing of elements.)

What I did:
1. Open a new transparent canvas 700 pixels x 700 pixels. Set both background & foreground to a neutral light colour, & use preset tool to create a circle. Activate text tool, hovering until the small A icon with curvy line shows where you want curved text to start, then change both background & foreground colours to desired text colour & type text into the pop-up box & click ok. I used Chris HMK Bold for all text. Use a smaller font for tag information.
2. Use magic wand tool to select the circle & fill with desired background material (paper 1).
3. Select a snowflake element (snowflake 1), copy & paste, resizing as desired & applying Effects>3D>chisel>thin white. Repeat as desired.
4. Choose a snowman element (snowman 2). Copy, paste, resize & position in the center of the tag.
5. Choose a flower element (garland). Copy & paste, resizing as necessary, & positioning at the bottom of the tag.
6. Merge visible & save.

This kit is currently on sale with 30% off. Hope you like what I did with it.

Enjoy.

Saturday, December 12, 2009

Cookies & Milk

Kelli (aka Krazy Mom Designz) has a cute scrap kit out called Christmas Cookies N Cream. Several CT members are working with the kit, which is full size & comes with its own posers. It's a fun kit. Check out her blog for when she posts all the results.
I made you a freebie quick page, & 2 tags with tutorials.
Tutorial for “Santa’s Snack” tag

What I used:
Full size scrap kit from Krazy Mom Scrapz called “Christmas Cookies N Cream”
http://yourscrapaddiction.com/index.php?main_page=product_info&cPath=1_176&products_id=1386
http://krazymomdesignz.blogspot.com/
Adobe Photoshop Creative Suite 4
(Make sure “show transform controls” is checked for easy resizing of elements.)

What I did:
1. Open a new transparent canvas 700 pixels x 700 pixels. Use the circular selection tool to create a circle. Fill with background of choice (paper 5).
2. Copy & paste large Oreo cookie element, resizing & placing in lower center of circle.
3. Select the sitting poser figure, Copy & paste, resizing as needed, & position sitting on cookie. Apply bevel & emboss effect.
4. Select snack elements (milk in glass, plate of cookies, cookie 04). Copy & paste, resizing as needed & positioning as desired.
5. Apply text. I used Santa’s Big Secret 12. To curve text, right click on text in layers palette, select warp text, select direction of arch & adjust horizontal & vertical to taste. Use a smaller font (Arial 4) to enter tag information.
6. Merge visible & save.

Tutorial for “Moo-y Christmas” tag

What I used:
Full size scrap kit from Krazy Mom Scrapz called “Christmas Cookies N Cream”
http://yourscrapaddiction.com/index.php?main_page=product_info&cPath=1_176&products_id=1386
http://krazymomdesignz.blogspot.com/
Adobe Photoshop Creative Suite 4
(Make sure “show transform controls” is checked for easy resizing of elements.)

What I did:
1. Open a new transparent canvas 700 pixels x 700 pixels. Fill with background of choice (paper 12), then create a new layer & use the circular selection tool to create a circle & fill with background of choice (paper 8).
2. Copy & paste posers of choice (elfkins 01 & 06). Resize as needed & position as desired.
3. Choose a cow element & copy, paste, resize & position.
4. Apply text of title. I used Cookies font.
5. Use preset shape to create speech bubble. Create new layer to apply text to the speech bubble. I used Monotype Corsiva for this text as well as for the name. Use a smaller font (Arial 4) for tag information.
6. Merge visible & save.

I'm looking forward to seeing what the other CT members do. Hope you like my contribution.

Enjoy.

Friday, December 11, 2009

Frosty Love


Tagging Angel N Scraps has an adorable new kit called "Frosty Love", tagger size but created at 300 dpi so it can still be used for scrapping. To prove it I make you a quick page freebie along with 2 tags I had fun making (with accompanying tuts, of course).
As soon as I saw this kit, I could immediately visualize a couple of wonderful tags. I hope you like them as much as I do.

Tutorial for “Winter Romance – Frosty Love” tag

What I used:
Tag kit by Tagging Angel N Scraps “Frosty Love”
http://yourscrapaddiction.com/index.php?main_page=product_info&cPath=1_133&products_id=1324
Poser by MediEvil Creations
http://medisaddiction.blogspot.com/
Adobe Photoshop Creative Suite 4.0
(Make certain show transform controls is checked to allow easy resizing of elements.)

What I did:
1. Open a new blank transparent canvas. In this case I started with 700 pixels x700 pixels but later enlarged to 900 pixels x 900 pixels. Use the circular selection tool to create a circle. Fill with background of choice (paper 6).
2. Choose a bower element (rose swag 1). Copy & paste, positioning aligned with the upper curve of the circle. Apply bevel & emboss effect.
3. Choose your background elements (lamp post, metal tree, carriage). Copy & paste, resizing as needed & positioning as desired. Apply bevel & emboss effect to each element.
4. Choose a fae element (2- pavilion). Copy & paste, resizing as needed & positioning in the center. Apply bevel & emboss effect.
5. Copy & paste your poser of choice (Medi-snowqueen 4), resizing as needed & positioning as desired. Apply bevel & emboss effect.
6. Enter desired text. I used CaslonNo540SwaD italics 12, but used the transform controls to enlarge the main text after the tag was made. Apply bevel & emboss effect. Use a smaller font, with no effects to enter tag information along the bottom.
7. Merge visible & save.


While I was going for a romantic look with the first tag, I wanted light-hearted fun for the second tag & to use some of the snowman elements. I purchased the poser set a couple of months ago & when I was going through my collection, Snoeflake demanded to be used.


Tutorial for “Love Warms the Heart” tag

What I used:
Tag kit by Tagging Angel N Scraps “Frosty Love”
http://yourscrapaddiction.com/index.php?main_page=product_info&cPath=1_133&products_id=1324
Poser by MediEvil Creations
http://medisaddiction.blogspot.com
Adobe Photoshop Creative Suite 4.0
(Make certain show transform controls is checked to allow easy resizing of elements.)

What I did:
1. Open a new transparent canvas 700 pixels x 700 pixels & fill with the background of your choice (paper 1).
2. Select a fae element (3-pedestal). Copy & paste, resizing as needed & positioning lower center of the tag. Apply bevel & emboss effect.
3. Select snowman elements (sitting frosty, standing frosty) & copy & paste. Resize the snowmen to a comfortable fit & position on either side of the pedestal. Apply bevel & emboss effect.
4. Copy your poser of choice (Medi-snoeflake3), resizing as needed & positioning on or near the pedestal. Apply bevel & emboss effect.
5. Choose a snowflake element (flake 1). Copy & paste, resize & apply bevel & emboss effect. Repeat as desired.
6. Enter desired text (CaslonNo540SwaD italics 12). Use the transform controls to enlarge any text as desired. Apply bevel & emboss effect. Use a smaller font to enter tag information.
7. Merge visible & save.

This was a fun kit to work with & hint, hint, is currently reduced in price!

My computer is currently driving me nuts; including glitches in typing, & it has to go into the shop. They can’t come get it until Tuesday or later, but is barely useable. I’ll be back once it’s fixed.

Enjoy

Monday, December 7, 2009

one kit - so many possibilities!


The minute I saw the latest kit by Wacky Winnie Designz, I just had to work with it! It's called My Blue Christmas, but what grabbed my eye was the snowmen! I love working with snowmen!


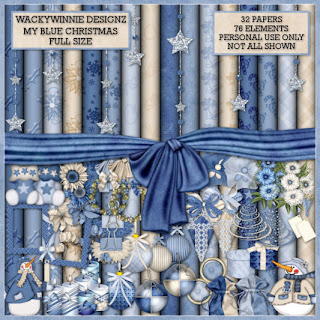
It comes in both full & tag size. I used full size so I could make both some quick pages for you & some tags.


Tutorial for “Love Warms Body & Soul”

What I used:
Scrap kit from Wacky Winnie Designz called “My Blue Christmas” available in both full & tag size. Visit her blog www.wackywinniedesignz.blogspot.com for the list of stores her products are sold at.
Posers from Medi Evil’s Creations www.medisaddiction.blogspot.com.
PSP XI (I keep the pick tool enabled because it allows for easy resizing of elements. In Adobe programs make certain either the show transform controls box is checked or the show bounding box.)

What I did:
If you want to have text on the outside path of your tag, you have to decide that before you begin because text has to be placed on a vector layer & as soon as you work with the background, it will prompt you for a conversion to being a raster layer. I do not know how to place text on a path in Adobe programs – if anyone has an easy tutorial on how to do this, please share it with me.

1. Open a new transparent canvas 700 pixels x 700 pixels. Make sure both your background & foreground materials are the same colour. You will change the actual background later, so go with a plain colour. Use your preset shape tool to create a circle.
Now select your text tool & hover where you wish to place the text. A small icon of an “A” above a curve should appear. Click & type your desired text in the pop up box. Do not click apply text yet. Highlight desired text within the pop up box & then click on your background & foreground colours palette & select your desired colour for the text. Do not use the same colours as your preset shape. Click “apply” command in the text pop up box. Now use your magic wand to highlight your preset shape & fill with the background material of your choice (paper 19). You will be prompted to change to layer into a raster layer, click ok.

2. Choose a “rain” element (rain 1). Copy & paste the element, resizing to fit, & using the lasso tool to trim the element to conform to the circular shape of the tag.

3. Choose the snowman elements (snowman 1 & 2), mirroring one of them before the copy & paste. Adjust for size as desired – both are originally the same size but I chose to make one larger than the other. Apply Effect>3D>Inner Bevel. (I no longer remember what my default bevel is, sorry, but experiment to find what you like.)

4. If your poser of choice is sitting, choose a gift box for the poser to sit upon (gift box 3).

5. Copy & paste your poser of choice (Medi-the frosts). Resize & position as desired. Apply inner bevel effect.

6. Depending on your poser choice, you may wish to choose elements to place in the hands. I chose bougainville 1 to place in the girl’s hands & candy cane 2 to place in the boy’s hand.

7. Enter any other main text. In this case, I used Cataneo 11. Use a smaller font for tag information.

8. Merge visible & save.

Tutorial for “Decorate Your Heart”

What I used:
Scrap kit from Wacky Winnie Designz called “My Blue Christmas” available in both full & tag size. Visit her blog www.wackywinniedesignz.blogspot.com for the list of stores her products are sold at.
Posers from Medi Evil’s Creations www.medisaddiction.blogspot.com.
PSP XI (I keep the pick tool enabled because it allows for easy resizing of elements. In Adobe programs make certain either the show transform controls box is checked or the show bounding box.)

What I did:
If you want to have text on the outside path of your tag, you have to decide that before you begin because text has to be placed on a vector layer & as soon as you work with the background, it will prompt you for a conversion to being a raster layer. I do not know how to place text on a path in Adobe programs – if anyone has an easy tutorial on how to do this, please share it with me.

1. Open a new transparent canvas 700 pixels x 700 pixels. Make sure both your background & foreground materials are the same colour. You will change the actual background later, so go with a plain colour. Use your preset shape tool to create a circle.
Now select your text tool & hover where you wish to place the text. A small icon of an “A” above a curve should appear. Click & type your desired text in the pop up box. Do not click apply text yet. Highlight desired text within the pop up box & then click on your background & foreground colours palette & select your desired colour for the text. Do not use the same colours as your preset shape. Click “apply” command in the text pop up box. I used Cataneo 11 & applied Effects>3D>chisel>thin white. Now use your magic wand to highlight your preset shape & fill with the background material of your choice (paper 25). You will be prompted to change to layer into a raster layer, click ok.

2. Choose a tree (tree 1). Copy & paste, adjusting size so tat tree is nicely centered. Apply Effects>3D>inner bevel.

3. Choose gift box elements (gift box 1, 2, 3,4). Copy & paste desired number, resizing each & positioning as desired. Apply inner bevel effect to each.

4. Copy & paste desired poser (Medi-snow queen 5). Adjust poser size & position as desired. Apply inner bevel effect. In this case I also chose an element (ball 3) to place in the poser’s hands & applied inner bevel after the copy, paste, resize & position.

5. Add any further desired text in same font as the curved text & apply the same effects. Use a smaller font without effects for tag information.

6. Merge visible & save.


Enjoy


Sunday, December 6, 2009

quick page & some tags

JT Designs has a cute kit called Candy Cane Lane & I've done a layout, created a quick page freebie based on the layout, & made 2 tags with accompanying tutorials.

The little sweetie in the layout is a toddler my friend is in the process of adopting.


Tutorial for “My Sweet Pals” tag

What I used:
Kit from JT’s Designs called Candy Cane Lane
http://digifoxsstudio.net/store/index.php?main_page=product_info&cPath=1_103&products_id=1606 (full)
http://digifoxsstudio.net/store/index.php?main_page=product_info&cPath=1_103&products_id=1607 (tag)
Poser from Medi Evil’s Creations http://medisaddiction.blogspot.com/
Adobe Photoshop Creative Suite 4 (Make sure show transform controls is checked to allow for easy resizing of elements.)

What I did:
1. Open a new transparent canvas 700 pixels x 700 pixels. Use circular selection tool to create a large circle. Fill with background of choice (paper 7).
2. Choose a tree element (element 82). Copy & paste, resizing as needed, & positioning off to the side. Apply bevel & emboss effect.
3. Choose a heart element (element 16). Copy & paste, resizing & positioning as desired. Apply bevel & emboss effect.
4. Choose a decorative element (element 45- snowflake dangle). Copy & paste, resizing & positioning as desired. Apply bevel & emboss effect.
5. Copy & paste poser of choice (medi-naomee3), resizing & positioning as desired. Apply bevel & emboss effect.
6. Copy & paste the teddy bear element (element 27), resizing & positioning beside poser. Apply bevel & emboss effect.
7. Enter desired text. In this case I used Kingthing’s Christmas font. To shape the text, click the text in the layers palette, choose warp text, then arch. Use a smaller font for tag information (Arial 4). 8. Merge visible & save.

Tutorial for “Greetings” tag

What I used:
Kit from JT’s Designs called Candy Cane Lane
http://digifoxsstudio.net/store/index.php?main_page=product_info&cPath=1_103&products_id=1606 (full)
http://digifoxsstudio.net/store/index.php?main_page=product_info&cPath=1_103&products_id=1607 (tag)
Poser from Medi Evil’s Creations http://medisaddiction.blogspot.com
Adobe Photoshop Creative Suite 4 (Make sure show transform controls is checked to allow for easy resizing of elements.)

What I did:
1. Open a new transparent canvas 700 pixels x 700 pixels & fill with background of choice ((paper 2).
2. Choose a frame (doodle overlay 1). Copy & paste, resizing to tag boundaries.
3. Choose a dangly element (element 32). Copy & paste, resizing to fit along top edge of tag.
4. Choose a decorative element (element 61). Copy & paste, resizing & positioning as desired. In this case I duplicated the element & applied the bevel & emboss effect to both.
5. Copy & paste your poser of choice (medi- hollieday ball 8), resizing & positioning as desired. Apply bevel & emboss effect.
6. Enter desired text. In this case I used Lauren script & applied a glitter style by Yarrow & applied the bevel & emboss effect. Use a smaller font for tag information.
7. Merge visible & save.

This kit has potential to spare. I've really barely scratched the surface. This month only the kit is on sale for an incredible $0.99!

Enjoy.