Wednesday, March 31, 2010

Quick Page set & tag with Yesterday's Love


If you follow my blog you know I am always extra happy to work with certain designers' new kits because I like everything they make. One such designer is Jane aka JT's Designs. Yesterday's Love is a gorgeous kit & even comes with 4 posers. Check out her blog for a list of the many stores where her work is available.
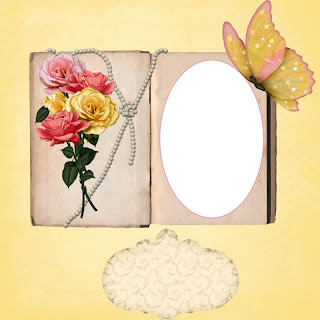
I've made you a set of 2 quick pages & done a tag with tutorial.

Tutorial for tag with Yesterday’s Love

What I used:
Scrap kit by JT’s Designs called Yesterday’s Love. (See her blog
http://www.jtsdesigns.blogspot.com/ for a list of her stores.)
This kit includes 4 posers by 3 different designers. I used the poser from Outlaw by Design.

Adobe Photoshop Creative Suite 4.0. Make sure “show transform controls” is checked to allow easy resizing of elements.

What I did:
Start with a new transparent canvas 700 pixels x 700 pixels. Use circular selection tool to create a circle. Fill with background of choice (paper 8).
Choose a background element (clock). Adjust opacity to 70%.
Optionally choose a decorative element. I chose trim. Copy & paste your choice, resizing appropriately. In the case of this trim I moved the 2 pieces to a layer below the clock, kept the trim layers highlighted in the layers palette, & erased the portion that went directly beneath the clock.
Copy & paste your poser of choice (outlaw by design ft254), adjusting for size. Apply bevel & emboss effect.
Copy & paste an element of your choice (rusty heart), resizing as needed. Apply bevel & emboss effect.
Enter desired text. I used old script font for the main wording, curved it & then applied a style (TST cherry chocolate glitters style 2). To make the text curve, right click the text in the layers palette & choose “warp text”, altering the settings to taste. For the name on the tag I used renaissance font & applied a gold style from Karen Stimson. Use a simple font (Arial) in a small size for tag information.
Merge visible & save.

Enjoy.

Wednesday, March 24, 2010

DSO colour challenge - Hop Into Spring

Hop Into Spring - link list below
I've been having trouble designing lately because running scripts & actions is triggering absence seizures which leave me needing a nap. I really wanted to get a kit done for this month's colour challenge at DSO though, so I worked a bit at a time over the last 2+ weeks. Working sporadically, just thinking "oh, this would go nice", I lost track of the kit's size - consequently, it's one of my largest (if not the largest) kits ever. I know it will take some time to download, but I worked really hard, & I think it's worth the trouble. I hope you all agree.
I finally figured out how to put all the kit's files into a folder on 4shared & give you a single link to that folder - I've tried before, but this time I figured out how to get a functioning link (although my first attempt produced an invalid link) - I tested the link to be sure!
If you take the time to download, please also take a moment more to leave a comment, either under this post, or in the Shout box - right now I really need the encouragement.
Hope you like the kit & are having a good month - I do not want to see any more white stuff on the ground for a good, long time!

OK - despite my testing the link successfully yesterday - today it doesn't work! 4shared is driving me nuts! So sorry for the problem. Back to individual links:
http://www.4shared.com/file/248812643/cf644351/mlc_Hop_Into_Spring_e01.html
http://www.4shared.com/file/248816805/c797993d/mlc_Hop_Into_Spring_e02.html
http://www.4shared.com/file/248820340/bd0f625b/mlc_Hop_Into_Spring_e03.html
http://www.4shared.com/file/248822732/b140f5e7/mlc_Hop_Into_Spring_e04.html
http://www.4shared.com/file/248825975/dc01b0f3/mlc_Hop_Into_Spring_e05.html
http://www.4shared.com/file/248828197/50f57534/mlc_Hop_Into_Spring_e06.html
http://www.4shared.com/file/248831462/e1a439a5/mlc_Hop_Into_Spring_e07.html
http://www.4shared.com/file/248834714/721e443c/mlc_Hop_Into_Spring_e08.html
http://www.4shared.com/file/248835917/59355fe9/mlc_Hop_Into_Spring_e09.html
http://www.4shared.com/file/248838952/bf59b6bf/mlc_Hop_Into_Spring_p01.html
http://www.4shared.com/file/248843309/3d4a45b5/mlc_Hop_Into_Spring_p02.html
http://www.4shared.com/file/248849066/9654a19f/mlc_Hop_Into_Spring_p03.html
http://www.4shared.com/file/248853271/407218c7/mlc_Hop_Into_Spring_p04.html
http://www.4shared.com/file/248858374/e6db017e/mlc_Hop_Into_Spring_p05.html
http://www.4shared.com/file/248861420/a32612fd/mlc_Hop_Into_Spring_p06.html
http://www.4shared.com/file/248864935/f551b452/mlc_Hop_Into_Spring_p07.html

Enjoy

Wednesday, March 17, 2010

April Desktop calendar & quick page

Are you ready for spring?


Are you as sick of winter as I am?


I was looking for a colourful, cheerful kit to work with & I found it in Miss Foxy's April Showers, available in both full size and tag size.

I made an April desktop calendar freebie with this kit & I love how it turned out. Then I couldn't quit playing with it, so I made you a freebie quick page too.
Bright & cheerful - hope you like them.
Enjoy.

Wednesday, March 10, 2010

Antique Rose quick pages & tag with tut


JT's Designs Antique Rose is a great kit for heritage layouts. I enjoyed working with it.

I did 2 heritage layouts, created 2 quick page freebies for you, & then did a tag with tutorial.


Tutorial for “Old-fashioned girl” tag

What I used:
Scrap kit by JT Designs Antique Rose
http://yourscrapaddiction.com/index.php?main_page=product_info&cPath=1_137&products_id=1830
(full)
http://yourscrapaddiction.com/index.php?main_page=product_info&cPath=1_137&products_id=1831
(tag)
Poser by Sinful Mindz http://sinfulmindz.blogspot.com
Adobe PhotoShop Creative Suite 4.0
(Make sure “show transform controls” is checked to allow easy resizing of elements)

What I did:
Open a new transparent canvas 700 pixels x 700 pixels. Use preset shape to create a heart shape. Use new fill layer, with “use previous layer to create clipping mask” checked to fill with background of choice (paper 9).
Select a decorative type element to be in the background (doily 1). Copy & paste, resizing if necessary.
Copy & paste your poser of choice (sm_delerium3-5), resize & position in center of tag. Apply bevel & emboss effect.
Choose floral element(s). (I used 2 copies of rose 1.) Copy, paste, resize as necessary, & position as desired around the poser. Apply bevel & emboss effect.
Choose a butterfly (butterfly 6). Copy & paste, resizing as necessary, & position as desired. Apply bevel & emboss effect.
Choose your font & entered desired text. (I used Bix Antique Script HMK Bold.) To make it curve, right click on the text in the layers palette, choose “warp text” & manipulate the setting as desired. I also applied a style (Krissy Scraps True Love Bevel 3). Use a smaller font for tag information.
Merge visible & save.

Enjoy

Monday, March 8, 2010

A change in tutorial style - Feedback welcomed

I'm writing this tutorial in a different style for 2 reasons:
1. I read a complaint about tutorials being just "copy & paste" step by steps to reproduce the exact tag. I've tried to make my tutorials somewhat concept orientated, but the reality is that as a CT member for various stores & designers, I'm supposed to make the Pay-To-Use(PTU) kits I use look attractive & useful, in the hopes that people will want to buy the kit. I use freebie (FTU) kits sometimes as well, but I've always thought the point of providing the tutorial was to help others make something similar for themselves. I'm not sure what people are looking for, expecting from my tutorials. I've changed my writing style for this tutorial & would appreciate feedback about how you feel.
2. I've combined 2 different tags made with 2 different kits, both by one designer, into one tutorial.

I love Wicked Princess kits & I am thrilled to be accepted onto her CT team. I already had a stash of her kits that I wanted to tag with, so being on her team is simply providing extra motivation to get to them. This time around, I used her self-titled "Wicked Princess" kit as a challenge to myself, because being dark & gothic, it was out of my comfort zone. I also used her "Mysterious Rendezvous" kit because I thought I could make an interesting tag, more detailed than my usual simple tags.


Tutorials for “the Music of Love” & “Wicked Princess”
I recently read a complaint that all the tutorials these days are just “Copy & Paste” & don’t teach anything beyond exact duplication of the tag created, so I am going to write this tutorial a little bit differently, to try & address that complaint.
What I used:
Wicked Princess tag kits:
“Mysterious Rendezvous”
http://www.scrappinbratz.com/shoppe/index.php?main_page=product_info&cPath=19_113&products_id=2921
“Wicked Princess”
http://www.scrappinbratz.com/shoppe/index.php?main_page=product_info&cPath=19_113&products_id=3208
Both these kits contain poser figures by Sophisticated Imaging http://sophisticatedscraps.blogspot.com but you can use any poser or tube you feel suits your purpose. In the tag I made with “Wicked Princess” I used a poser from Graphics by Belle (BW9) that I received through membership in her yahoo group. It is important to include a credit to the creator of the tube or poser on any tag you make. I used the one of the posers provided in “Mysterious Rendezvous” (doll 1) for the “Magic of Love” tag.
What I did:
I did both these tutorials using Photoshop Creative Suite 4. I have also done tutorials using Photoshop Elements 6 & Paint Shop Pro X. Whichever program you prefer, adjust your settings to allow easy manipulation of element size. In PSCS, make sure “show transform controls” is checked; in PSE, make sure “show bounding box”; in PSP, make sure pick tool is activated. When you highlight an element in the layers palette, a hyphenated box will appear around that element & you can resize it by manipulating the corners of that box.
It is best to come up with a basic vision of your tag before you start. It will help you choose your backgrounds & elements. You can experiment as you go, by making a layer invisible & try something else on a new layer. Any layers you don’t want in the finished tag can be deleted or left invisible.
Choose your tag size & create a blank transparent canvas. Usual canvas sizes vary between 500 pixels x 500 pixels to 800 pixels x 800 pixels. If you want text on the outside of the tag, you should start larger, but all programs will allow you to adjust your canvas size at any point. Keep in mind some sites that sell posers & tubes specify a maximum size & dpi. Always ensure that your tag complies with any such restrictions.
Both these tags started with a canvas 700 pixels x 700 pixels.
Some people like to start with a pre-made template. I sometimes take ideas from templates, but I don’t usually use templates.
Choose the shape you want your tag to be. “Music of Love” (hereafter referred to as tag 1) is a basic square, while “Wicked Princess” (tag 2) uses a circle base, topped with an oval layer. Create the shape(s) & then fill with the background of your choice (tag 1 paper 9; tag 2 papers 19 & 6).
Next comes the “copy, paste, resize & position as desired” steps.
Choose your elements, based on your vision for the tag. My vision for tag 1 was an elegant parlour setting, while tag 2 was a venture out of my usual comfort zone into dark & gothic. So I chose light colours overall, & elements one would find in an elegant parlour used as a music room for tag 1 (piano, piano bench, piano keys, cello, swag, sofa, candle rose, & a rose) & chose dark colours & outside elements for tag 2 (castle, 2 heart trees, arch). Experiment with the various effects available in your program to make certain elements stand out. I applied the bevel & emboss effect to the piano keys stretching across tag 1 & to both the castle & the arch in tag 2. I also applied inner glow, outer glow & inner shadow to the arch in tag 2. In trying out effects & styles, the undo can be your best friend. Just keep playing until you are satisfied with how it looks.
Even when a poser is included in your kit of choice, you may choose to use another poser instead. One of the other things it can be fun to experiment with is adding elements to the poser. Sometimes you may want to discretely erase part of the poser or the element to make it look more normal. I erased the mask from the poser’s hand in tag 1 to add the fan, while I erased little bits of the basket & the lattice heart elements in tag 2 to make the poser hands look like they were holding the elements.
Choose your font carefully. I used Chopin Script 14 for tag 1 & Jewels 14 for tag 2. Choose a colour that harmonizes with your tag, but is still visible. I had problems choosing a text colour for tag 1, experimenting with a wide variety. You may also want to experiment with text warping & other effects or styles applied to the text. With tag 1, each word was on a separate layer, so it could be arranged along the piano keys. With tag 2, I right clicked the text in the layer palette & chose warp, & then applied an “overspray” style.
Use a smaller size font for tag information like poser or tag credit & tag creator. Always include this information along with any license number, if applicable.
Play around with your tag & do not merge & save until you are happy with your tag. It is your tag. Experiment. Practice. Have fun. Oh, & be warned it can be addictive.

So what do you think? Are my tutorials useful? I know the complaint was generic, but keeping track of exactly what you do & trying to communicate it clearly to others takes time & effort. It would be much simpler to just make the tags & forget the tuts, if no one actually gets anything out of the tuts. So I really do want your feedback.
Hope you like both the tags & the tuts. Enjoy

Saturday, March 6, 2010

March 2010 desktop calendar


Sorry this is late, but my computer got hit by a hijack program in late February & my computer had to be wiped - I got it back last night, stripped of all programs etc. I got my design software reinstalled & got to work on a desktop calendar freebie for March.

I used Lucky by Sticky Kisses, I really needed a good splash of colour, I am so sick of snow!
Enjoy