I bought a poser from Medievil Creations called kewti punk because it reminded me of the character Abby. I decided to revisit a kit called Devonika by Wicked Princess to make a tag.
I used Adobe PSCS 4 with "show transform controls" enabled and a blank 700 pixel x 700 pixel square filled with paper 2. I chose poser 3 and dressed her in the hat, collar and piercing from the kit. I also used the chalkboard, boots and shoes.
Enjoy
Showing posts with label tutorial. Show all posts
Sunday, August 12, 2012
Friday, March 16, 2012
Berries in my Basket
BLT has a 300dpi tag size kit called Berries in my Basket wich is sweet as a fresh picked strawberry and includes 2 posers by Designed by K..
I made a qp then couldn't find it in the computer file until I recreated the page and tried to save it.the 2 pages are similar but not identical, so I'm letting you decide which one you want (or both, if you wish).
http://www.mediafire.com/?78zad2b49ds4237
http://www.mediafire.com/?e495xb1ki5sx2ie
I also made a cute tag, My cat is currently lying on my notebook so I'll have to rely on my memory.
Almost all tags rely upon the copy, paste, resize as needed, position as desired. If the is some other way to get elements into a tag, somebody reveal the mystery to me.
Start with transpaent canvas 700 pixels x700 pixels and use your circulas selection tool to create as large a circle as possible.
Fill the circle with your background of choice (p2 at 44%). Choose a frame (frame3) to fit overtop your backeground.
Copy and paste etc the tube or poser or figure of your choice. (Cookie), the temporarily adjust the opacity so you can see where the figure and the frame. use the eraser to remove the overlap to make it look like the figure is in the figure, leaning out. Restore 100% opacity to figure, Add your desired embellishments from the elements. I used bow 2 to make Cookie's hat more interesting, then placed the heart on a rope sround her neck as a necklace, erasing most of the rope.
I wasn't thrilled with the existing flowers on the frame, so coved them up with strawberry vine. and added the ladybug.
Tag 2 and teddy bear were the last elements added. The tag made the perfect place to put the name (Santas Big Secret) with the upper left area of the frame alllowing plenty of room for the sentiment .(Creampuff). Always add tag information, in a small but legible font.
(ps - if you like the posers but find neither positioned quite the way you wish they are Designed by Kay - Berri Shortcakes. are CU, with 6 poses to choose from.
Enjoy.
http://www.mediafire.com/?78zad2b49ds4237
http://www.mediafire.com/?e495xb1ki5sx2ie
Almost all tags rely upon the copy, paste, resize as needed, position as desired. If the is some other way to get elements into a tag, somebody reveal the mystery to me.
Start with transpaent canvas 700 pixels x700 pixels and use your circulas selection tool to create as large a circle as possible.
Fill the circle with your background of choice (p2 at 44%). Choose a frame (frame3) to fit overtop your backeground.
Copy and paste etc the tube or poser or figure of your choice. (Cookie), the temporarily adjust the opacity so you can see where the figure and the frame. use the eraser to remove the overlap to make it look like the figure is in the figure, leaning out. Restore 100% opacity to figure, Add your desired embellishments from the elements. I used bow 2 to make Cookie's hat more interesting, then placed the heart on a rope sround her neck as a necklace, erasing most of the rope.
I wasn't thrilled with the existing flowers on the frame, so coved them up with strawberry vine. and added the ladybug.
Tag 2 and teddy bear were the last elements added. The tag made the perfect place to put the name (Santas Big Secret) with the upper left area of the frame alllowing plenty of room for the sentiment .(Creampuff). Always add tag information, in a small but legible font.
(ps - if you like the posers but find neither positioned quite the way you wish they are Designed by Kay - Berri Shortcakes. are CU, with 6 poses to choose from.
Enjoy.
Labels:
digital scrapbooking freebie,
quick page,
tag,
tutorial
Saturday, January 21, 2012
Strawberry Kisses
Well, shout box has discontinued their free plan & at this time I can't afford to pay, but you don't have to do any image verification to leave a regular comment, so please consider doing so. I will appreciate it.


Isn't she cute? Jen, I will always love you.
I entered an abc challenge this month that featured the letter "P". I decided to use some adorable pictures I snapped approximately 30 years ago. I chose Strawberry Kisses by Wicked Princess Scraps to do the layout.


Isn't she cute? Jen, I will always love you.
Then I made a simple tag, making copies for friends. As always I used Adobe PSCS4 with "show transform controls" enabled. After opening a new transparent canvas 700 pixels x 700 pixels, I used the heart wreath frame as a base, filling the opening with paper 14, then applying the bevel & emboss effect to the frame. I adorned the frame with satin flower & butterfly, applying the bevel & emboss effect to both, then additionally applying drop shadow to the butterfly. I used a poser by Mystical Illusions (miz-Sarabeth cookie 2010-5). The font is Renaissance. Always remember to include tag info, usually in a smaller font.

Hope you like it.
Friday, June 10, 2011
Some Forgotten Melody qp set & tag


Ok. Been spending more time in hospital ERs than at home lately, but have managed to get a little bit of work done. Dare's Design has a new heritage type kit available called Some Forgotten Melody.

I've made a set of quick pages & done a tag.

I used Adobe Photoshop Creative Suite 4 to make the tag. Make sure "show transform controls" is enabled. Open a new transparent canvas 700 pixels x 700 pixels, use the circular selection tool to create a circle & fill with background of choice (paper2).
Select your elements. I used musical notes (22) & victrola (23). Copy, paste, resize as needed, & position each element as desired. I used 5 copies of the musical notes - 4 copies were placed around the circle with parts overlapping the edges of the circle & then moved to layers below the circle, while 1 copy of the notes was placed on the layer above the victrola. I used a metallic style on these notes so they showed up against the background.
I then added my poser of choice (dnscraps' little lolita doll5) & applied an effect called 'hard edge' which is an exaggerated drop shadow.
I used different fonts on this tag: Bangle for the theme, Baroque Script for the name, & Arial for the tag information. I used an effect called 'groovy' on all the text, which is inner shadow+ outer glow+inner glow.
When I was finshed, I saved the tag in my program's default format (psd) & in a web friendly format (png).
Enjoy.
Labels:
digital scrapbooking freebie,
quick pages,
tag,
tutorial
Wednesday, April 13, 2011
Easter Teaser - cute alert
I'm working on a charity kit contribution, but when I saw the preview for PSP Girl's new tag kit Easter Teaser, my brain immediately kicked me with ideas & wouldn't let me be, so I quickly did 2 quick pages & a simple tag. It's a kit suitable for more than just Easter layouts. When your brain is really fired up pages & tags seem to fly up onto the screen & I really love the pages I came up with, just need pics of the new baby in my extended family (HINT).
I used Adobe Photoshop Creative Suite, with 'show transform controls' enabled.
1. Open a new canvas 700 pixels x 700 pixels, use the circular selection tool to create a circle, & fill with background of choice (paper 9).
2. Choose your elements (1,6,11) & copy, paste, resize as needed & position as desired. I also applied a bevel & emboss effect & inner glow to each element. I did the same with my poser of choice (ws-nixie gown 2-3) from Wyked Soulz.
3. I used Arial 3 for the tag information, & Chopin Script 14 for the rest of the tag, with a style from Harold designs (christmas style7) applied.
4. Save in both your program's default format as well as in a web compatible format.
Enjoy
Labels:
digital scrapbooking freebie,
quick pages,
tag,
tutorial
Monday, March 28, 2011
Sweet Madeline
(Please note - I extracted the teddy bears on top of the boxes from an element in the kit.)
Yesterday, I worked with Sweet Madeline, a kit from Wicked Princess that comes in full or tagger. Check out Shani's blog for links to where she sells. I did a layout featuring each one of Shani's precious children, & then made a matching quick page freebie for each layouts - which means this quick page set features 3 pages instead of my usual 2 - bonus!
I also made a very simple tag. As usual I used Adobe Photoshop Creative Suite, with 'show transform controls' activated.
Start with a blank 700 pixel x 700 pixel canvas, use your circular selection tool to create a circle & fill it with your background of choice (paper 2).
I chose a single element, the moped, to copy,paste, resize & position, then applied the bevel & emboss effect. I did the same with my poser of choice from Medievil Creations (medi huggles 4).
I used Campanero font for the main saying, right clicking the text in the layers palette & choosing warp text, arch. Adjust the degree of arch to fit your circle. I then applied a glitter style to the text, & used the same glitter on the name which used a font called Candice. The tag information was entered using Arial3. (Told you it was a very simple tag.)
Enjoy
Labels:
digital scrapbooking freebie,
layouts,
quick pages,
tag,
tutorial
Friday, March 25, 2011
Almost April


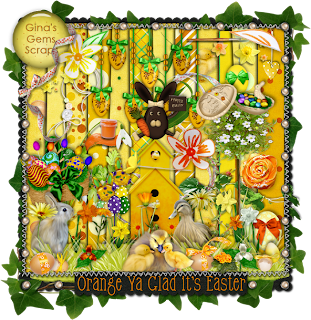
I've been keeping an eye out for a good kit to make my April desktop calendar with & I finally found one - it's by Gina's Gems Scraps & it's called "Orange You Glad It's Easter". I don't celebrate the holiday Easter because the pagan origins conflict with my beliefs (I do observe a celebration of the Lord's Evening Meal, an occasion most of you are probably familiar with as the Last Supper.) I chose this kit, however, because of its cheerful colour palette of oranges & yellows with some greens - springtime colours.

In addition to the April 2011 desktop calendar, I created a quick page for you, & made a simple tag.

I used Adobe Photoshop Creative Suite 4 to create the tag, with 'show transform controls' enabled. Enable the equivalent in whatever graphics program you use & you can easily resize elements by simply manipulating the 'box' that forms around the element - I greatly prefer this option to calculating percentages by which to resize, because math has never come easily to me.
1. Open a new transparent canvas 700 pixels x 700 pixels & use your circular selection tool to create a circle. Fill the circle with your background of choice (paper 28).
2. Select the elements you wish to use. I used grassy knoll, baby duck 1 & 2, & daffodil 9. I also used a poser by Medievil Creations (Medi-Easter 4). Copy, paste, resize, & position each element as desired. I also applied a 'bevel & emboss' effect to each element & the poser.
3. Enter the desired text. I used a font called Havix HMK Bold for all the text, including the tag information, simply using a smaller font for the text I wished to be less prominent.
4. When you are satisfied with the tag it is a good idea to save in both your program's default format as well as a web friendly format like png. It makes it easy to make another tag with a different name.
Enjoy
Thursday, March 3, 2011
Irish Rose

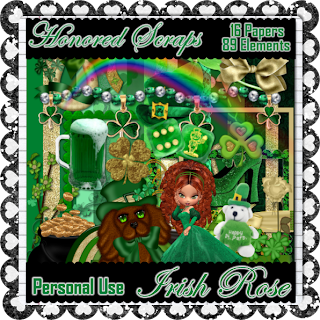
Yesterday I played with Irish Rose from Honored Scraps. I made 2 quick pages & a tag. The kit includes some lovely posers by Medievil Creations.


The tag is basically simple. I used Adobe Photoshop Creative Suite 4. Make sure that "show transform controls" or whatever your software program equivalent may be is enabled so you can adjust the size of elements & text by simply moving the corners of the 'box' that forms around the item. If your program doen't include the one step 'bevel & emboss' effect, experiment to find something to make things stand out a bit from the background.

1. Open a new transparent canvas 700 pixels x 700 pixels, use the circular selection tool to create a circle & fill the circle with your background of choice (paper 7).
2. Choose a pot of gold as your background element (pot of gold 3), copy, paste, resize as needed & position as desired. I applied bevel & emboss & outer glow.
3. Choose your other elements to copy, paste, resize & position. I used St.paddy puppy, 2 copies of blossom, poser medi-erynn 6 & rose 2. I applied bevel & emboss to each element. I erased part of the rose stem to make it appear the poser was holding the rose.
4. Choosing the right font & what text effects, if any, to use is often the area I experiment with most, backtracking & undoing until it is just the way I saw it in my mind. I eventually settled upon GE Signature Script. To curve the text right click on the text layer in your layer palette & choose warp text, then play with the settings to get the right amount of curve for your circle. I applied a default Adobe style called 'sunspot', then added bevel & emboss, as well as inner glow. I also used Arial font in a small size for the tag information.
5. It's a good idea to save your original in your program's default format & save a copy in your choice of web-compatible format.
Enjoy
Labels:
digital scrapbooking freebie,
quick pages,
tag,
tutorial
Tuesday, March 1, 2011
Steampunk Style

Today I played with the 3rd kit in Wicked Princess' steampunk series called Cornelia Marie Quincy. It comes in both tag & full sizes & includes posers by Lisa of Sophisticated Imaging.

Steampunk kits are great for heritage style pages & I've made a 2 quick page set for you.

I also made a tag - these kits are a chance to play interior decorator. Since I was planning to do a 2-floor view, I made the tag a bit larger than usual, 800 pixels x 800 pixels. I used Adobe Photoshop Creative Suite 4 with "show transform controls" enabled. Use different papers to create the illusion of floors & walls (paper 5 floor, paper 19 1st floor, paper 21 2nd floor). There is a large variety of elements to furnish your rooms with. I used grand curtain, staircase, balcony, grandfather clock, table, & rosecandle. I applied the bevel & emboss effect to each element & to the poser (Cornelia standing), but drop shadow will work if you are using a different software. I used Annabel Script 14 for the theme words & name, & Arial 4 for the tag info.

Enjoy
Labels:
digital scrapbooking freebie,
quick pages,
tag,
tutorial
Monday, February 14, 2011
Stepping Out

Today I got to work with JT's Designs' latest kit "Stepping Out" - it's a fabulous kit, very diverse. Check out Jane's blog for a list of stores where she sells her designs She also makes lovely commercial use items.

I've made you a set of quick pages & done a tag. I couldn't decide if the art deco page looked best with the writing or without, so both versions are included.

I made the tag using Adobe Photoshop Creative Suite 4, with "show transform controls'' enabled for easy resizing of elements. I've imported the effects from my Photoshop Elements into Creative Suite so I don't need to close my work in the one program & reopen it in the other if I want to use an effect available in the one software but not the other.
1. Open a new transparent canvas 700 pixels x 700 pixels & fill with your background of choice (paper 4 at 80%).
2. Choose your elements (dress 3, shoes 1, purse 2) & copy, paste, resize & position each as desired.
3. Choose a poser or tube. I'm using a poser by Medievil Creations (medi-boopsie 1). Copy, paste, resize & position, then apply bevel & emboss effect. (If you are using a different software, drop shadow is a suitable substitute.)
4. I decided to use the title banner instead of theme text. After the copy, paste, resize & position stage, I applied bevel & emboss followed by outer glow.
5. I used a font called Diamond for the name & applied an effect called groovy, which is a one step effect that applies inner shadow, outer glow & inner glow. I used Arial for the tag info & again applied the groovy effect , to make the text more visible.
6. When satisfied with your tag, do a final save.

Enjoy.
Labels:
digital scrapbooking freebie,
quick pages,
tag,
tutorial
Monday, February 7, 2011
quick page set & tag with Elna

Nannie Bernie has a new kit called Elna & she has graciously allowed me to play with it.


I've made 2 quick pages & a tag.
I created the tag using PSCS, with "show transform controls" activated. All the major graphics programs have the equivalent of this - "show bounding box" (PSE) or the pick tool (PSP) which creates a box around the element, allowing it to be easily resized by manipulating the corners - much easier than calculating percentages to resize.
1. Open a new transparent canvas 700 pixels x 700 pixels, & use the circular selection tool to create a circle. fill the circle with background of choice (paper 20 at 30%).
2. Select a background element (dangle 2) & copy, paste, resize, & position as desired. I simply repeated the element twice more. You might choose to use a variety of elements.
3. Choose a poser to copy, paste, resize & position. I used Angelic Posers avaloniaD3 & applied the bevel & emboss effect & an outer glow.
4. Enter desired text. I used Johannes 10 for the main text. To curve the text, I right clicked on the text layer in the layer palette, selected warp text, & arch. i then applied a style called rainbow rust 1-1 by Dana Conditt. I also applied the same style to the name, but used a font called 'Love ya like a sister' in size 12. For the tag info I used Minion Pro for the tag credits.
5. Final step is a final save.

Enjoy.
Labels:
digital scrapbooking freebie,
quick pages,
tag,
tutorial
Wednesday, February 2, 2011
Love Joy Bliss goodies for you


I've made a set of 2 quick pages, a desktop calendar for March 2011, & a tag. Download

Tag Tutorial
I'm using Adobe Photoshop Creative Suite 4. Make sure "show trans form controls" (or your graphics program's equivilent) is enabled for easy resizing of elements.
1. Begin with a transparent canvas 700 pixels x 700 pixels & use your circular selection tool to create a circle, then fill with background of choice (paper 16).
2. Choose your background elements (fan 1, torn heart 1) & copy, paste, resize as needed, & position as desired.
3. Copy, paste, resize & position your poser of choice (Medi-aysia 2 by Medievil Creations). Choose elements to embellish the poser, if desired. I put flowers 1, 3, 4 to cover the flowers in her hair, applying the bevel & emboss effect; I also put vintage rose 1 into her hand, erasing the portion of stem over her thumb, & applied the bevel & emboss effect to the rose.
4. Choose any other elements desired. I really wanted the vanilla flower 1, which after copying, pasting, resizing & positioning, I applied bevel & emboss effect.
5. Enter desired text. I used Splendid font size 10 for the saying & Shardee 24 for the name. I then used a style from Creative Intentionz, exquisite 4 on both the saying & the name. I used Arial 2 for tag information.
6. When you are satisfied with your tag, do a final save.

If, like me you live in an area being hit by the massive storm, stay warm & safe.
Enjoy.
Subscribe to:
Posts (Atom)