Gina aka Kikeka kits has a lovely scrap kit out called Magic of Dance. You can click on either the image or the highlighted title above to be taken straight to the kit.

Tutorial for “Reach For Your Dreams” tag
What I used:
Lovely scrap kit from KiKeKa Kits called Magic of Dance
http://www.scrappinbratz.com/shoppe/index.php?main_page=product_info&cPath=19_32&products_id=3648
Poser by Lassie’s Designs http://lassiesdesigns.com (I used a PTU poser from her club membership; please do not use this poser without purchasing it. Lassie also offers an amazing selection of FTU posers.)
Adobe Photoshop Creative Suite 4 (make sure “show transform controls” is checked for easier resizing of elements).
What I did:
1. Open a new transparent canvas 700 pixels x 700 pixels. Use the circular selection tool to create a circle & fill with the background of your choice (paper 3).
2. Choose one of the ballerina silhouettes (ballerina 1), copy & paste, positioning a little of center & resizing as necessary. Adjust opacity to 60%.
3. Select other elements (light, beads), copy & paste, resizing as needed & positioning as desired.
4. Copy & paste your poser/tube of choice (LDmct40b), resizing if needed & positioning as desired. Apply bevel & emboss effect so poser/tube stands out a bit.
5. Choose your font & enter your desired text. (I used Freebooter 18.) Remember to use a small font to enter tag information like poser creator, license number if applicable, & tag creator.
6. Merge visible & save.

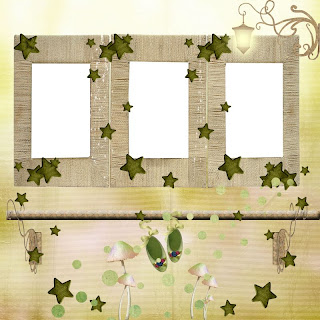
You can click on either the image or the highlighted title above to be taken straight to the kit.I've made you a freebie quick page to download & I've done 2 tags with accompanying tutorials.

Tutorial for “Reach For Your Dreams” tag
What I used:
Lovely scrap kit from KiKeKa Kits called Magic of Dance
http://www.scrappinbratz.com/shoppe/index.php?main_page=product_info&cPath=19_32&products_id=3648
Poser by Lassie’s Designs http://lassiesdesigns.com (I used a PTU poser from her club membership; please do not use this poser without purchasing it. Lassie also offers an amazing selection of FTU posers.)
Adobe Photoshop Creative Suite 4 (make sure “show transform controls” is checked for easier resizing of elements).
What I did:
1. Open a new transparent canvas 700 pixels x 700 pixels. Use the circular selection tool to create a circle & fill with the background of your choice (paper 3).
2. Choose one of the ballerina silhouettes (ballerina 1), copy & paste, positioning a little of center & resizing as necessary. Adjust opacity to 60%.
3. Select other elements (light, beads), copy & paste, resizing as needed & positioning as desired.
4. Copy & paste your poser/tube of choice (LDmct40b), resizing if needed & positioning as desired. Apply bevel & emboss effect so poser/tube stands out a bit.
5. Choose your font & enter your desired text. (I used Freebooter 18.) Remember to use a small font to enter tag information like poser creator, license number if applicable, & tag creator.
6. Merge visible & save.

Tutorial for “Magic of Dance” tag 2
What I used:
Lovely scrap kit from KiKeKa Kits called Magic of Dance
http://www.scrappinbratz.com/shoppe/index.php?main_page=product_info&cPath=19_32&products_id=3648
Poser by Lassie’s Designs http://lassiesdesigns.com (I used a PTU poser from her club membership; please do not use this poser without purchasing it. Lassie also offers an amazing selection of FTU posers.)
Adobe Photoshop Creative Suite 4 (make sure “show transform controls” is checked for easier resizing of elements).
What I did:
1. Open a new transparent canvas 700 pixels x 700 pixels. Use the circular selection tool to create a circle & fill with the background of your choice (paper 7).
2. Choose a background element (violin), copy & paste, resizing as needed & positioning approximately at center of tag, adjusting the opacity to 65% or whatever looks good with your choice of background paper.
3. Choose other elements (piano, butterflies). Copy & paste each element separately, resizing as needed, & positioning as desired. Make whatever creative choices seem appropriate. For example I allowed the piano keyboard to overlap the circle without trimming & then applied a bevel & emboss effect. I duplicated & mirrored the butterflies.
4. Copy & paste your poser/tube of choice (LDmc10b9b), resizing as needed & positioning as desired. Apply a bevel & emboss effect.
5. Use font of choice to enter desired text. In this case I used Babylon 14 with a Fruit Cocktail bevel 3 from Krissy’s Scraps applied. Use a smaller size font to enter tag information.
6. Merge visible & save.
While I used cu PTU poser tubes from Lassie's membership club, she also has an extensice collection of pu FTU poser tubes that is well worth any taggers time to check out!
http://lassiesdesigns.com
Enjoy


2 comments:
Just a quick note to let you know that a link to this post will be placed on CraftCrave in the Graphics category today [29 Apr 02:00pm GMT]. Thanks, Maria
Thank you so much for this post. I want to let you know that I posted a link to your blog in CBH Digital Scrapbooking Freebies, under the Page 12 post on Apr. 30, 2010. Thanks again.
Post a Comment