Media fire has changed how their service works & I cannot get a valid link to the file I uploaded, so I've uploaded to 4shared http://www.4shared.com/dir/24151879/b5927794/enchanted_garden.html
I apologize for the inconvenience.
Monday, November 23, 2009


DSO colour challenge - Enchanted Garden
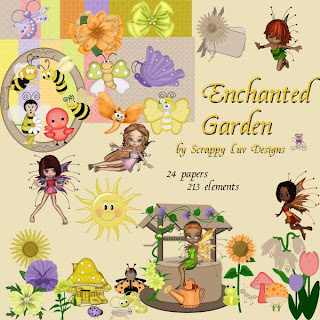
I finally completed this month's colour challenge at DSO - Enchanted Garden is a kit that grew - 24 papers & 213 elements. I was inspired by a pack of MediEvil Creations' posers that were on sale that I picked up & I included some of them in this kit.
Hope you like it.
Enjoy.
IMPORTANT - please see the following posts, the 2nd post on Monday for corrected download links & the first post on Tuesday for corrected element download. I apologize for any inconvenience.
Wednesday, November 11, 2009
quick page, tag & tut
 Creationz by Jo has a cute new kit wonderful Time of the Year
 So I have a quick page for you & a tag with tutorial.


Tutorial for “Have a very merry season” tag
What I used:
Kit from Creationz by Jo “Wonderful Time of the Year”
http://digifoxsstudio.net/store/index.php?main_page=product_info&cPath=1_93&products_id=1587 (full size)
http://digifoxsstudio.net/store/index.php?main_page=product_info&cPath=1_93&products_id=1586 (tagger size)
Poser by Medi Evil Creations
http://tkoscraps.com/store/index.php?main_page=product_info&cPath=33_125&products_id=2716
http://medievilsaddiction.blogspot.com
Adobe Photoshop Creative Suite 4
(Make sure “show transform controls” is checked to allow for easy resizing of elements.)
What I did:
1. Open a new transparent canvas 700 pixels x 700 pixels. Fill with background of choice (paper 12).
2. Choose an element to decorate the top of the tag (garland-element 94). Copy, paste, resize & position as desired.
3. Copy & paste Christmas tree (element 85), resizing as needed & centering in tag. Apply bevel & emboss effect.
4. Choose poser (Joie 1). Copy & paste, resizing as needed, & positioning off to side of the tree. Apply bevel & emboss effect.
5. Choose elements you want to place under the tree (elements 7, 8, 9, 82, 93, 94). Copy, paste, resizing & positioning as desired.
6. Enter desired text (Christmas Card 18 http://haroldsfonts.com). Use a larger size (20) for the name & a smaller size (6) for the tag information.
7. Merge visible & save.
Enjoy.
Monday, November 9, 2009
So Bad It's Good tag
Leather N Lace is the first kit by Naughty Angel that I've worked with, but hopefully not the last. As a tag kit made at 72 dpi it's not suitable for quick pages (sorry), but has plenty of potential for a variety of tags.

Tutorial for “So Good It’s Bad” tag
What I used:
Tag kit by Naughty Angel’s Creations Leather N Lace http://digifoxsstudio.net/store/index.php?main_page=product_info&cPath=1_107&products_id=1583
Poser by Med evil Creations http://tkoscraps.com/store/index.php?main_page=product_info&cPath=33_125&products_id=2375
http://medievilsaddiction.blogspot.com
Paint Shop Pro XI with pick tool activated for easy resizing of elements
What I did:
1. Open a new transparent canvas 700 pixels x 700 pixels.
2. Use circular selection tool to create a circle. Fill with background of choice (paper 1).
3. Select a background element. I used a cracked heart (element 62). Copy & paste, positioning in the center, adjusting for size as needed. Apply drop shadow (Effects>3D effects>drop shadow).
4. Select a corset (element 8). Copy & paste, resizing as desired. Apply drop shadow.
5. Choose a poser (Jessyka 4). Copy & paste, resizing as desired, & positioning to the side. Apply drop shadow.
6. Select other desired elements (element 20-heart, element 26-lipstick). Copy & paste, adjusting & positioning as desired. Apply drop shadow to the elements.
7. Apply text in chosen font (Cataneo 12). Use a smaller font size (4) for tag information.
8. Merge visible & save.
I love how it turned out. Hope you like it.
Enjoy
Monday, October 26, 2009
December 2009 desktop calendar & tag
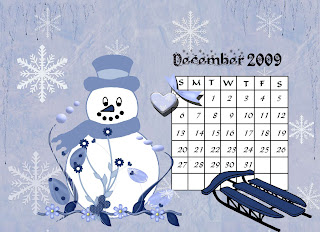 I know it's early, but I don't want to risk getting really sick again & not getting this posted. I bought a kit I thought would make a cute desktop calendar for December - Midnight Winter by Dorthi's Design.
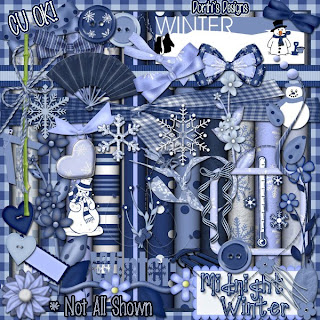
I also made a tag with tutorial.
Tutorial for “Whee!” tag
What I used:
Midnight Winter tag kit by Dorthi’s Designs
http://thecreativitybox.com/index.php?main_page=product_info&cPath=1_256&products_id=4367
Poser by Medi Evil Creations
http://medievilsaddiction.blogspot.com
Adobe Photoshop Elements 6.0
(Make sure “show bounding box” is checked for easy resizing of elements.)
What I did:
1. Open a new transparent document 800 pixels x 800 pixels. Use circular selection tool to create a circle & fill with background of choice (paper 3).
2. Choose a snowflake (snowflake 1), copy & paste, positioning in center of circle.
3. Choose a snowman (snowman 2). Copy & paste, resizing as needed, positioning off to the side.
4. Choose a sled (sled 2). Copy & paste, resizing as needed, positioning with a slight slant. Apply hard edge effect.
5. Choose your poser (Amalia 4), copy & paste, resizing as needed & positioning on sled.
6. Enter desired text. In this case I used Kingthing’s Christmas font, with groovy effects applied. Use a smaller size font for tag information.
7. Merge visible & save.
Enjoy.
Twilight Rose

Today I got a look at Foxy Designz new kit Twilight Rose - it is so beautiful & I was very happy she let me play with it.



Tutorial for “Reach for Your Dreams” tag
What I used:
Twilight Rose scrap kit by Foxy Designz
http://digifoxsstudio.net/store/index.php?main_page=product_info&cPath=1_3&products_id=1526 (full)
http://digifoxsstudio.net/store/index.php?main_page=product_info&cPath=1_3&products_id=1527 (tag)
Poser from Graphics by Belle http://groups.yahoo.com/groups/GraphicsbyBelle
Adobe Photoshop Creative Suite 4
What I did:
1. Open a new transparent canvas 700 pixels x 700 pixels. Use circular selection tool to create a large circle & fill with background of choice (paper 10).
2. Make sure show transform controls is checked for easy resizing of elements. Choose a flower element (rose 2). Copy & paste, resizing as needed & centering in circle.
3. Copy & paste ladder element, slanting slightly.
4. Copy & paste poser of choice (Cookie Fae 1), positioning & sizing as desired.
5. Enter desired text. In this case I used Nueva Std Italics 12. Use a smaller size font for tag information.
6. Merge visible & save.
Enjoy.
November 2009 desktop
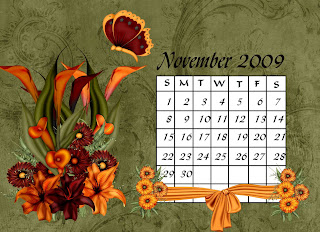 My health problems continue to plague me. I have a freebie kit in progress & will finish it soon, I hope. In the meantime, I've been playing with some recent kits I've bought & one I got as a member of a creative team, so I do have some goodies for you.
There are so many lovely autumn kits out there it was hard to pick one for my November desktop calendar, but I finally settled for Country Drive by Wacky Winnie's Designz
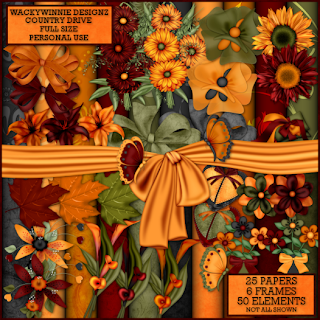 I also did a tag with tutorial.
Tutorial for “Cherish Your Memories” tag
What I used:
Country Drive kit by Wacky Winnie Designz
http://digifoxsstudio.net/store/index.php?main_page=product_info&cPath=1_102&products_id=1434 (tag)
http://digifoxsstudio.net/store/index.php?main_page=product_info&cPath=1_102&products_id=1433 (full)
Poser by Bits N Bobs http://scrappingbits.blogspot.com
Adobe Photoshop Creative Suite 4
(Make certain show transform controls is checked, for easy resizing of elements.)
What I did:
1. Open a new transparent document 700 pixels x 700 pixels. Use circular selection tool to create a circle & fill with background of choice (paper 13).
2. Copy & paste poser of choice (lady 1), resizing as needed.
3. Choose flower elements. Copy & paste large flower (flower spray 1), resize as needed & position at hem of poser’s dress. Apply bevel & emboss effect. Copy & paste smaller flower, positioning as if in poser’s hand. Apply bevel & emboss effect.
4. Choose a butterfly (butterfly2). Copy & paste, resizing & positioning as desired. Apply bevel & emboss effect.
5. Enter desired text. In this case I used Milano LET 14. Use a smaller font (Arial 4) for tag information. To make text curve, highlight in layers palette, right click, & choose warp text.
6. Merge visible & save.
Enjoy.
Subscribe to:
Posts (Atom)


 Posts
Posts