

What I used:
Full size scrap kit from Krazy Mom Scrapz called “Christmas Cookies N Cream”
http://yourscrapaddiction.com/index.php?main_page=product_info&cPath=1_176&products_id=1386
http://krazymomdesignz.blogspot.com/
Adobe Photoshop Creative Suite 4
(Make sure “show transform controls” is checked for easy resizing of elements.)
What I did:
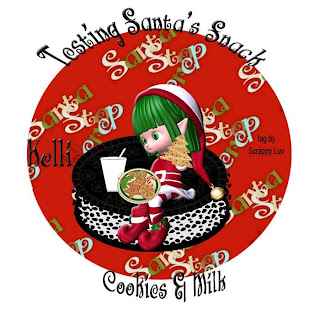
1. Open a new transparent canvas 700 pixels x 700 pixels. Use the circular selection tool to create a circle. Fill with background of choice (paper 5).
2. Copy & paste large Oreo cookie element, resizing & placing in lower center of circle.
3. Select the sitting poser figure, Copy & paste, resizing as needed, & position sitting on cookie. Apply bevel & emboss effect.
4. Select snack elements (milk in glass, plate of cookies, cookie 04). Copy & paste, resizing as needed & positioning as desired.
5. Apply text. I used Santa’s Big Secret 12. To curve text, right click on text in layers palette, select warp text, select direction of arch & adjust horizontal & vertical to taste. Use a smaller font (Arial 4) to enter tag information.
6. Merge visible & save.

Tutorial for “Moo-y Christmas” tag
What I used:
Full size scrap kit from Krazy Mom Scrapz called “Christmas Cookies N Cream”
http://yourscrapaddiction.com/index.php?main_page=product_info&cPath=1_176&products_id=1386
http://krazymomdesignz.blogspot.com/
Adobe Photoshop Creative Suite 4
(Make sure “show transform controls” is checked for easy resizing of elements.)
What I did:
1. Open a new transparent canvas 700 pixels x 700 pixels. Fill with background of choice (paper 12), then create a new layer & use the circular selection tool to create a circle & fill with background of choice (paper 8).
2. Copy & paste posers of choice (elfkins 01 & 06). Resize as needed & position as desired.
3. Choose a cow element & copy, paste, resize & position.
4. Apply text of title. I used Cookies font.
5. Use preset shape to create speech bubble. Create new layer to apply text to the speech bubble. I used Monotype Corsiva for this text as well as for the name. Use a smaller font (Arial 4) for tag information.
6. Merge visible & save.
I'm looking forward to seeing what the other CT members do. Hope you like my contribution.
Enjoy.


2 comments:
Thank you! Your blog post will be advertised on the DigiFree Digital Scrapbooking Freebie search engine today (look for timestamp: 12 Dec [LA 03:31pm, NY 06:31pm, UK 11:31pm] - 13 Dec [OZ 10:31am]).
Thank you for freebies. Link on your post was added to Lori's freebie list
Post a Comment