 Tagging Angel N Scraps has an adorable new kit called "Frosty Love", tagger size but created at 300 dpi so it can still be used for scrapping. To prove it I make you a quick page freebie along with 2 tags I had fun making (with accompanying tuts, of course).
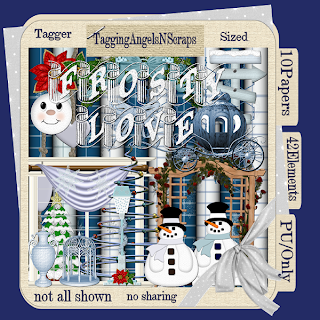

Tutorial for “Winter Romance – Frosty Love” tag
What I used:
Tag kit by Tagging Angel N Scraps “Frosty Love”
http://yourscrapaddiction.com/index.php?main_page=product_info&cPath=1_133&products_id=1324
Poser by MediEvil Creations
http://medisaddiction.blogspot.com/
Adobe Photoshop Creative Suite 4.0
(Make certain show transform controls is checked to allow easy resizing of elements.)
What I did:
1. Open a new blank transparent canvas. In this case I started with 700 pixels x700 pixels but later enlarged to 900 pixels x 900 pixels. Use the circular selection tool to create a circle. Fill with background of choice (paper 6).
2. Choose a bower element (rose swag 1). Copy & paste, positioning aligned with the upper curve of the circle. Apply bevel & emboss effect.
3. Choose your background elements (lamp post, metal tree, carriage). Copy & paste, resizing as needed & positioning as desired. Apply bevel & emboss effect to each element.
4. Choose a fae element (2- pavilion). Copy & paste, resizing as needed & positioning in the center. Apply bevel & emboss effect.
5. Copy & paste your poser of choice (Medi-snowqueen 4), resizing as needed & positioning as desired. Apply bevel & emboss effect.
6. Enter desired text. I used CaslonNo540SwaD italics 12, but used the transform controls to enlarge the main text after the tag was made. Apply bevel & emboss effect. Use a smaller font, with no effects to enter tag information along the bottom.
7. Merge visible & save.
While I was going for a romantic look with the first tag, I wanted light-hearted fun for the second tag & to use some of the snowman elements. I purchased the poser set a couple of months ago & when I was going through my collection, Snoeflake demanded to be used.
Tutorial for “Love Warms the Heart” tag
What I used:
Tag kit by Tagging Angel N Scraps “Frosty Love”
http://yourscrapaddiction.com/index.php?main_page=product_info&cPath=1_133&products_id=1324
Poser by MediEvil Creations
http://medisaddiction.blogspot.com
Adobe Photoshop Creative Suite 4.0
(Make certain show transform controls is checked to allow easy resizing of elements.)
What I did:
1. Open a new transparent canvas 700 pixels x 700 pixels & fill with the background of your choice (paper 1).
2. Select a fae element (3-pedestal). Copy & paste, resizing as needed & positioning lower center of the tag. Apply bevel & emboss effect.
3. Select snowman elements (sitting frosty, standing frosty) & copy & paste. Resize the snowmen to a comfortable fit & position on either side of the pedestal. Apply bevel & emboss effect.
4. Copy your poser of choice (Medi-snoeflake3), resizing as needed & positioning on or near the pedestal. Apply bevel & emboss effect.
5. Choose a snowflake element (flake 1). Copy & paste, resize & apply bevel & emboss effect. Repeat as desired.
6. Enter desired text (CaslonNo540SwaD italics 12). Use the transform controls to enlarge any text as desired. Apply bevel & emboss effect. Use a smaller font to enter tag information.
7. Merge visible & save.
This was a fun kit to work with & hint, hint, is currently reduced in price!
My computer is currently driving me nuts; including glitches in typing, & it has to go into the shop. They can’t come get it until Tuesday or later, but is barely useable. I’ll be back once it’s fixed.
Enjoy


2 comments:
Thank you for freebies. Link on your post was added to Lori's freebie list
Thank you so much for this Freebie. I want to let you know that I posted a link to your blog in CBH Digital Scrapbooking Freebies, under the Page 10 post on Dec. 12, 2009. Thanks again.
Post a Comment