 I'll admit it - there are certain designers whose work I really love working with. Crystal's Designs is one of those designers & right now she has 3 new kits out I love. I picked Magical Winter as a CT for digifox studios & that's the one I'll feature in this post, but I couldn't resist purchasing her Let It Snow kit! I'm definitely going to be playing with it too, unless the repairman comes for my computer. I really hope I get to work with her Roses & Lace kit, I think it would make a lovely desktop calendar for February.
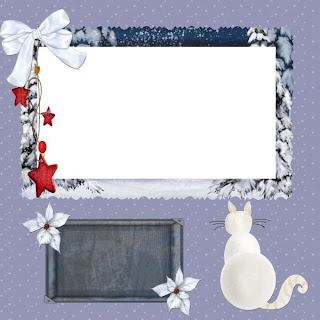
 So I made you a freebie quick page, a desktop calendar freebie for January 2010, & a very fast, simple tag you can easily make.
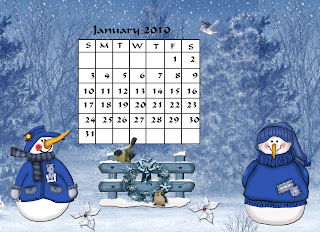

Tutorial for “Sno’ Better Time For Fun” tag
What I used:
Kit by Crystal’s Designs called Winter Magic
http://digifoxsstudio.net/store/index.php?main_page=product_info&cPath=5_26&products_id=1632 (tag)
http://digifoxsstudio.net/store/index.php?main_page=product_info&cPath=1_38&products_id=1631 (full)
Paint Shop Pro XI
(Make sure pick tool is enabled, for easy resizing of elements.)
What I did:
1. Open a new transparent canvas 700 pixels x 700 pixels. Set both background & foreground to a neutral light colour, & use preset tool to create a circle. Activate text tool, hovering until the small A icon with curvy line shows where you want curved text to start, then change both background & foreground colours to desired text colour & type text into the pop-up box & click ok. I used Chris HMK Bold for all text. Use a smaller font for tag information.
2. Use magic wand tool to select the circle & fill with desired background material (paper 1).
3. Select a snowflake element (snowflake 1), copy & paste, resizing as desired & applying Effects>3D>chisel>thin white. Repeat as desired.
4. Choose a snowman element (snowman 2). Copy, paste, resize & position in the center of the tag.
5. Choose a flower element (garland). Copy & paste, resizing as necessary, & positioning at the bottom of the tag.
6. Merge visible & save.
This kit is currently on sale with 30% off. Hope you like what I did with it.
Enjoy.


2 comments:
Thank you for freebies. Link on your post was added to Lori's freebie list
Thank you so much for this Freebie. I want to let you know that I posted a link to your blog in CBH Digital Scrapbooking Freebies, under the Page 14 post on Dec. 15, 2009. Thanks again.
Post a Comment